
The Mountain Flyer – Camera Edition
The Quest for the Ultimate Backcountry Camera Backpack
As a full-time freelance photographer and videographer, the Covid-19 pandemic has essentially canceled my entire workload for the foreseeable future. On one hand, that’s a massive bummer. But on the other, it’s given me ample free time to pursue a little project that’s been rattling around in my head for the last couple of years. That project is based entirely on the question “What would a backpack look like that merges ultralight design principles with instant camera access?”
If your first reaction to that question is to say that product already exists, you can skip to the end of this post and see all the different products I’ve tried and why none of them are totally ideal.
But if you read that question and think “YES! I want to carry an ultralight pack so I can simultaneously carry 5 extra pounds of camera gear” you might find the rest of this post interesting.
So without further ado, here is my first foray into the deep and dark underworld of Make Your Own Gear.
Warning, this post is excessively detailed and most definitely nerdy AF. Proceed at your own risk.
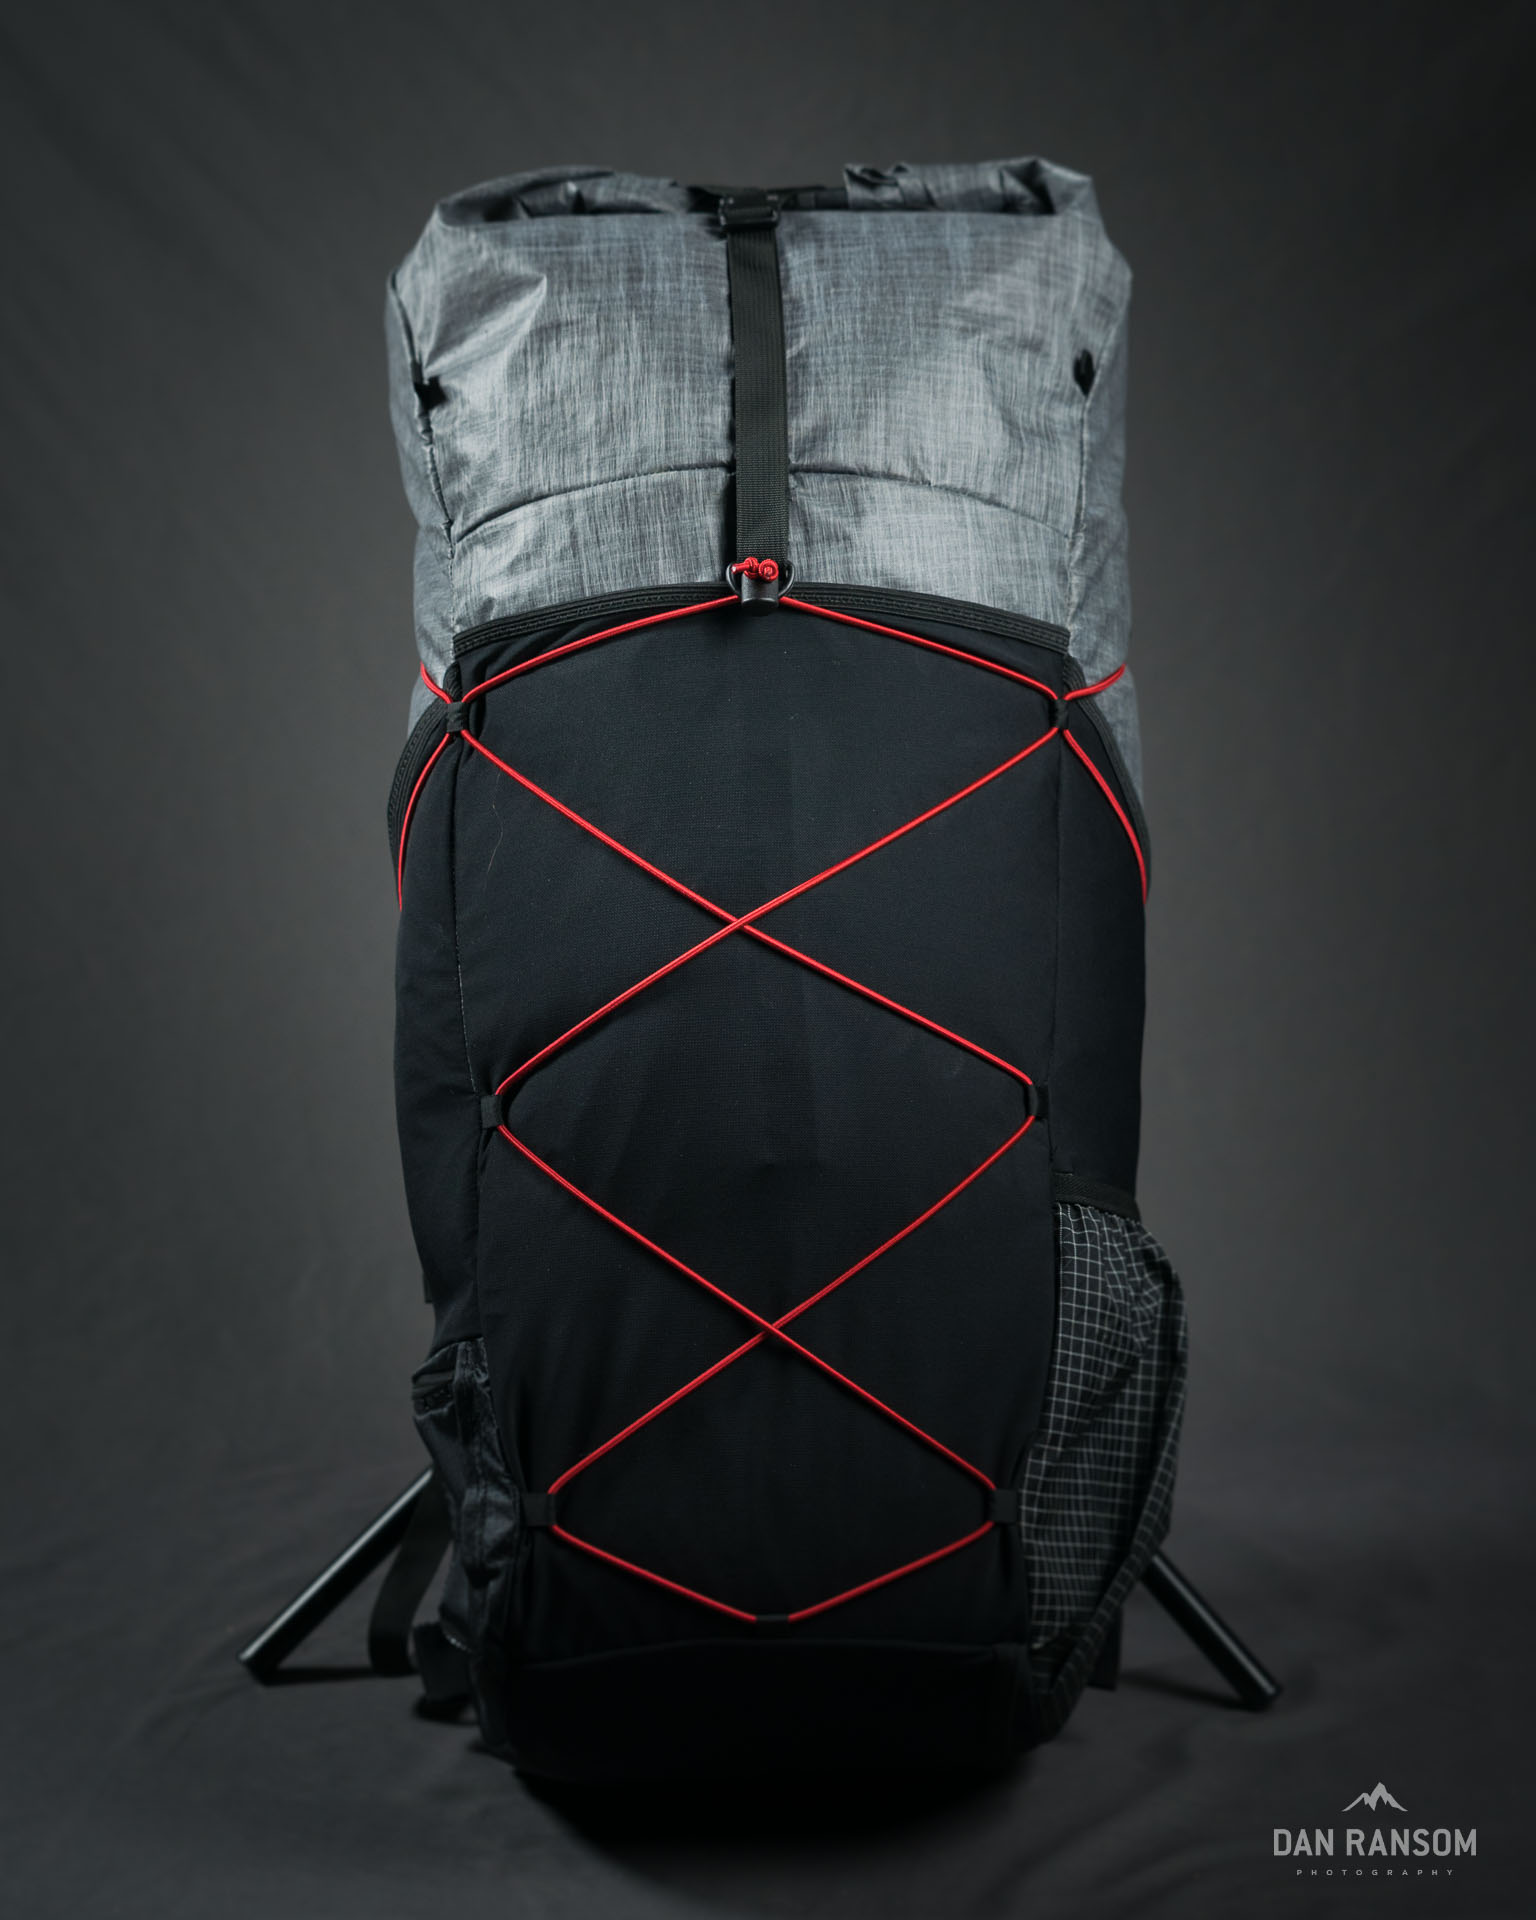
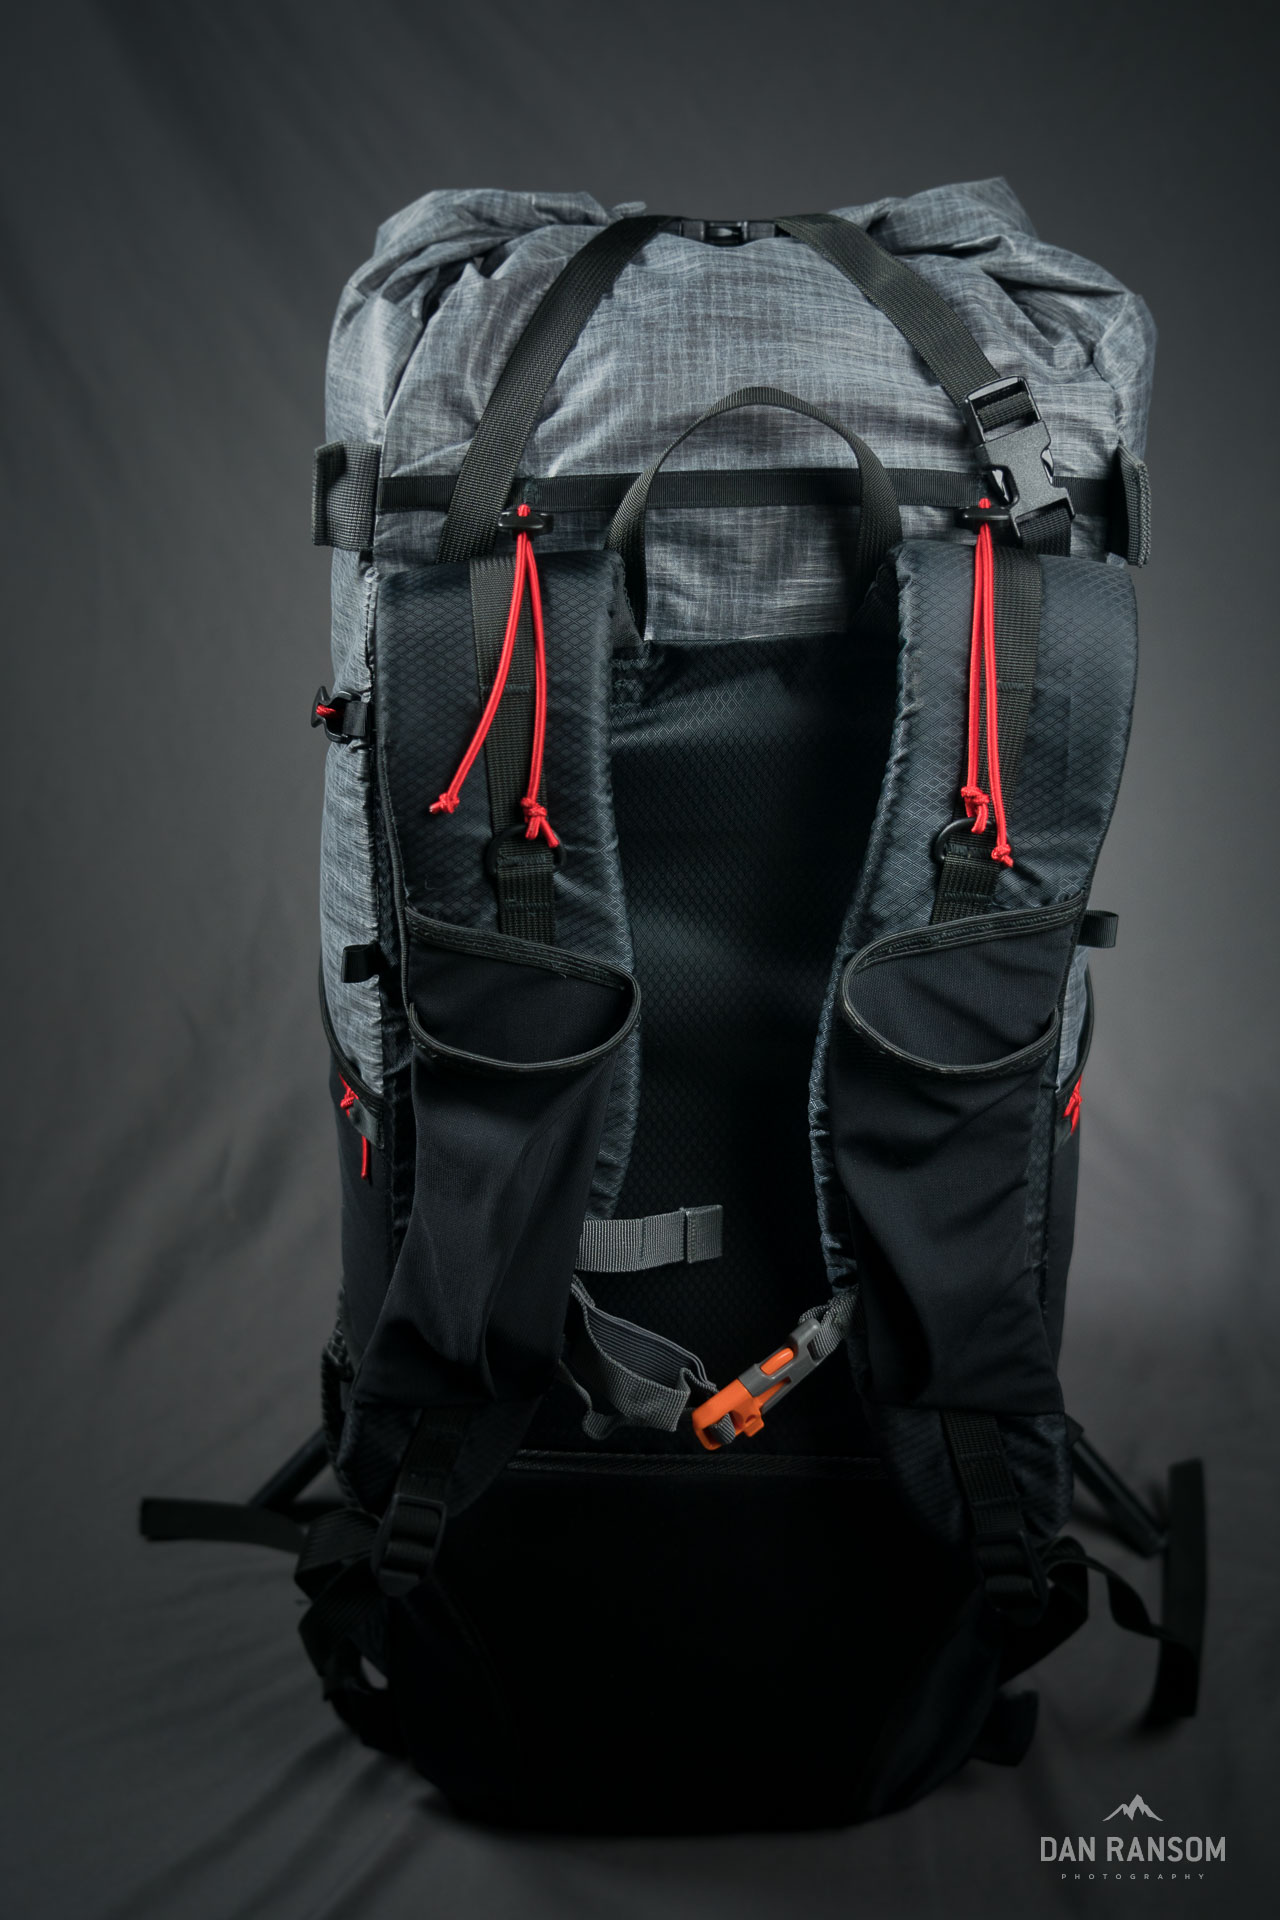
Introducing v1 of the Mountain Flyer – Camera Edition
I built this pack for a very specific use case – multi-day backpacking trips in non-technical terrain. And the primary feature this pack is designed around is the ability to access my camera without taking my pack off, and not have to strap it awkwardly to my chest or pack.
By non-technical terrain, I generally mean terrain without heinous bushwacking, sandstone rasslin’, or gnarly weather conditions. The construction on this pack is fairly light to save weight, and it isn’t likely to take a serious beating. Think 5-7 day trips, where total pack weights will be below 35 lbs. This will be ideal for trips like the Uinta High Route or Wind River High Route.
This pack would never survive in harsher locations like off-trail on the Colorado Plateau or the Grand Canyon where abrasion resistance would need to be much higher. But for a walk above treeline with my camera? This pack will excel.
On the surface, this beast is built largely on the platform of the Mountain Flyer from Bag Buff. Dig a little deeper, and you’ll find even more borrowed ideas and weird tinkering.
The most obvious and significant modification is the camera access panel and integrated insert, but there are some serious changes to the suspension system as well. However, none of those modifications are possible if it wasn’t for Stephen at Bag Buff for allowing full access to the illustrator files in the pattern, as well as an entire video tutorial of how a rank amateur like myself should put this together. This was massively helpful the more tinkering I started doing, especially cutting panels apart into sub assemblies and designing the foam camera insert.
Anyways, here’s the quick and dirty details.
Overall Weight:
38 oz: Includes Rigid Frame, Camera Insert, and Hipbelt
Fabric
Main Pack: Liteskin LS07
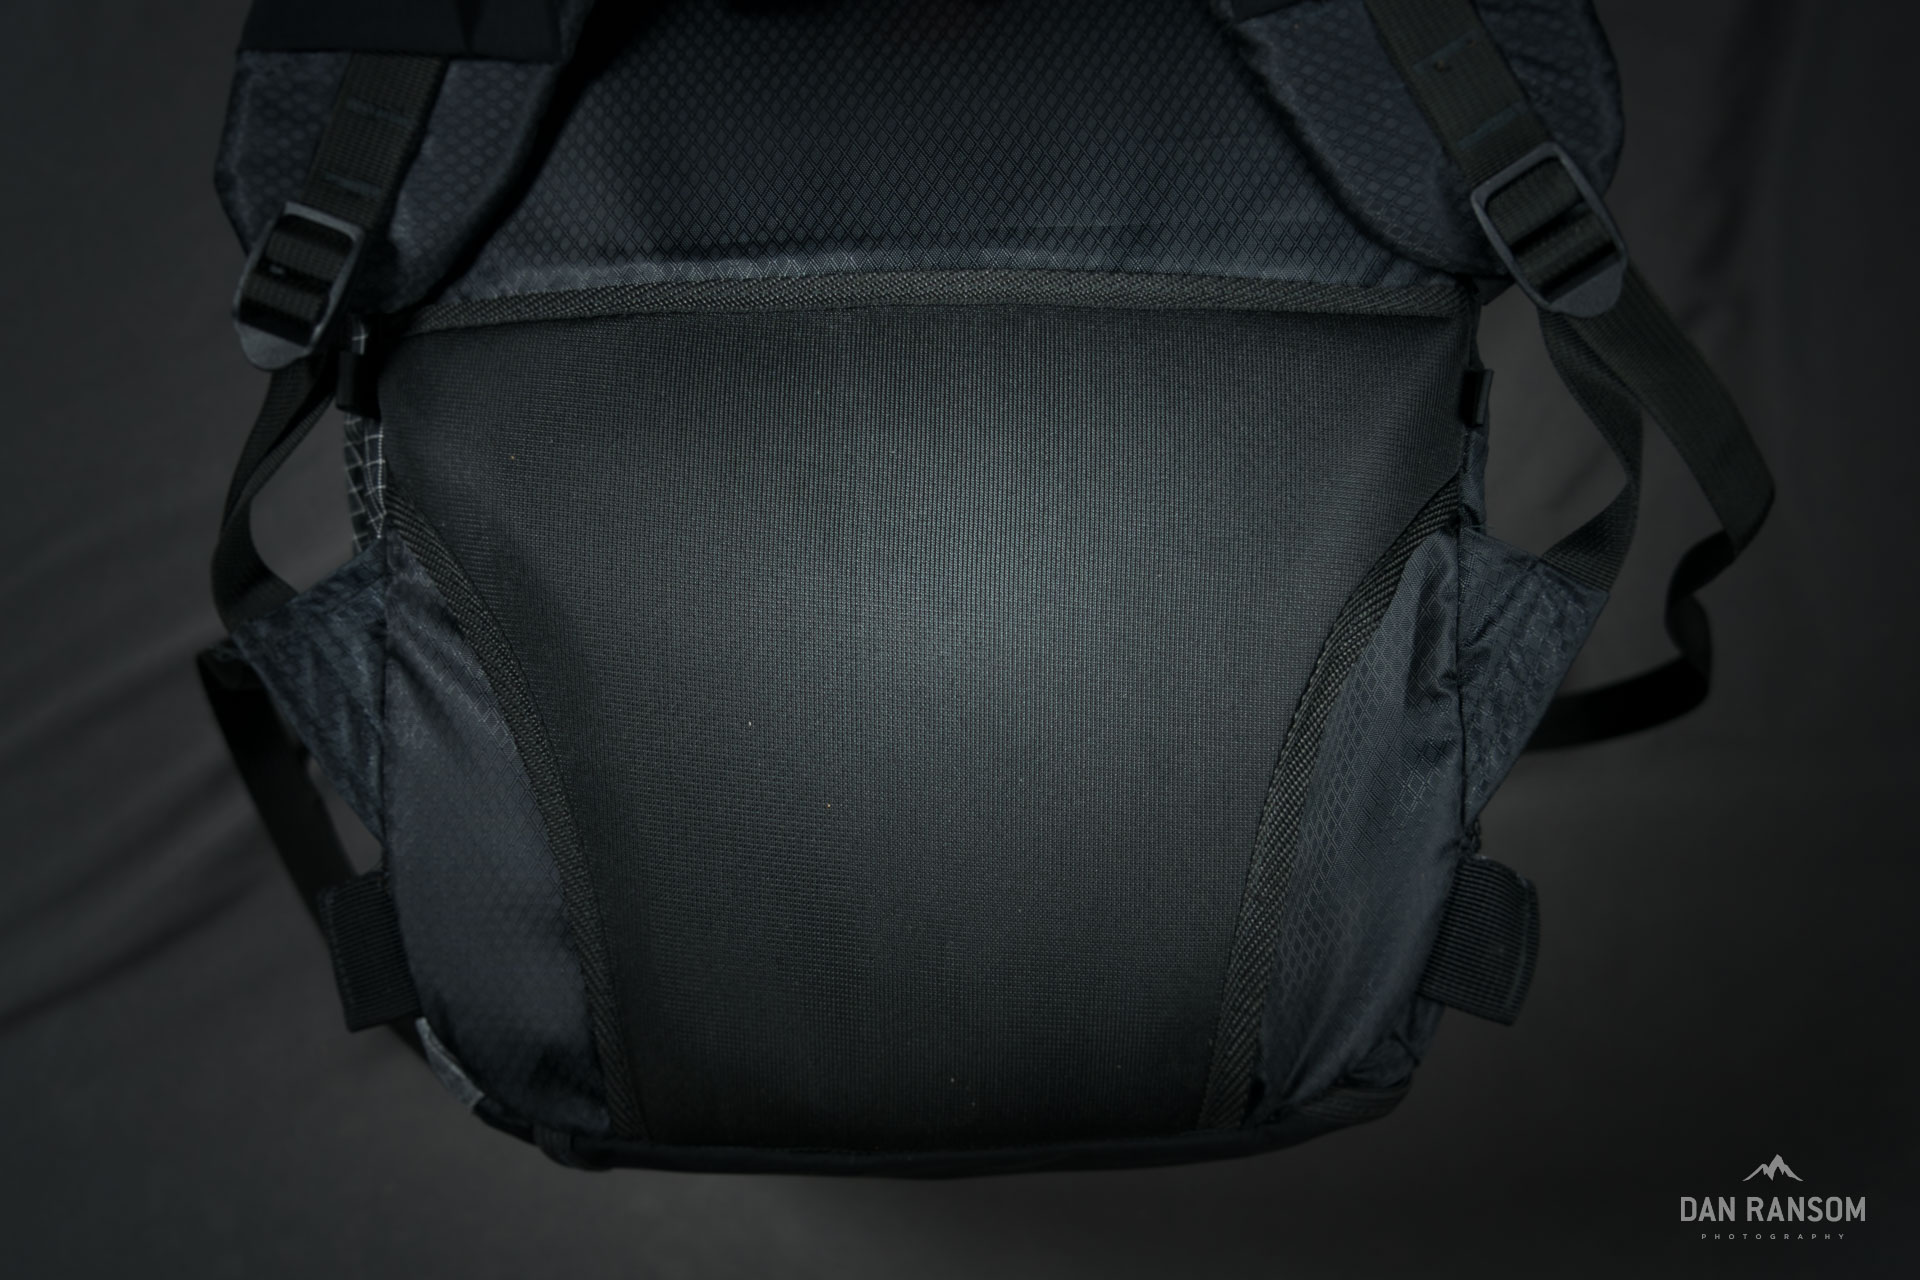
Back and Bottom Panel: Hyper D 300
Pockets: Lycra Mesh from Quest
Lining: 1.9oz Ripstop
Features
Instant Camera Access
Modular framesheet and stays
Removable hip belt
Stretch Shoulder Pockets
Stretch Bottom Pocket
Elevated Side Pockets
Load lifters
Component Weight
Backpack, Stripped: 17.04 oz
Camera Insert: 4.23 oz
Removable Hipbelt: 7.62oz
Rigid Frame Sheet with Stays: 9.7 oz
EVA Back Pad: 1.09oz
External Stays: 1.73oz
Sternum Strap: .75 oz
Shock Cord: .85 oz
Camera Access
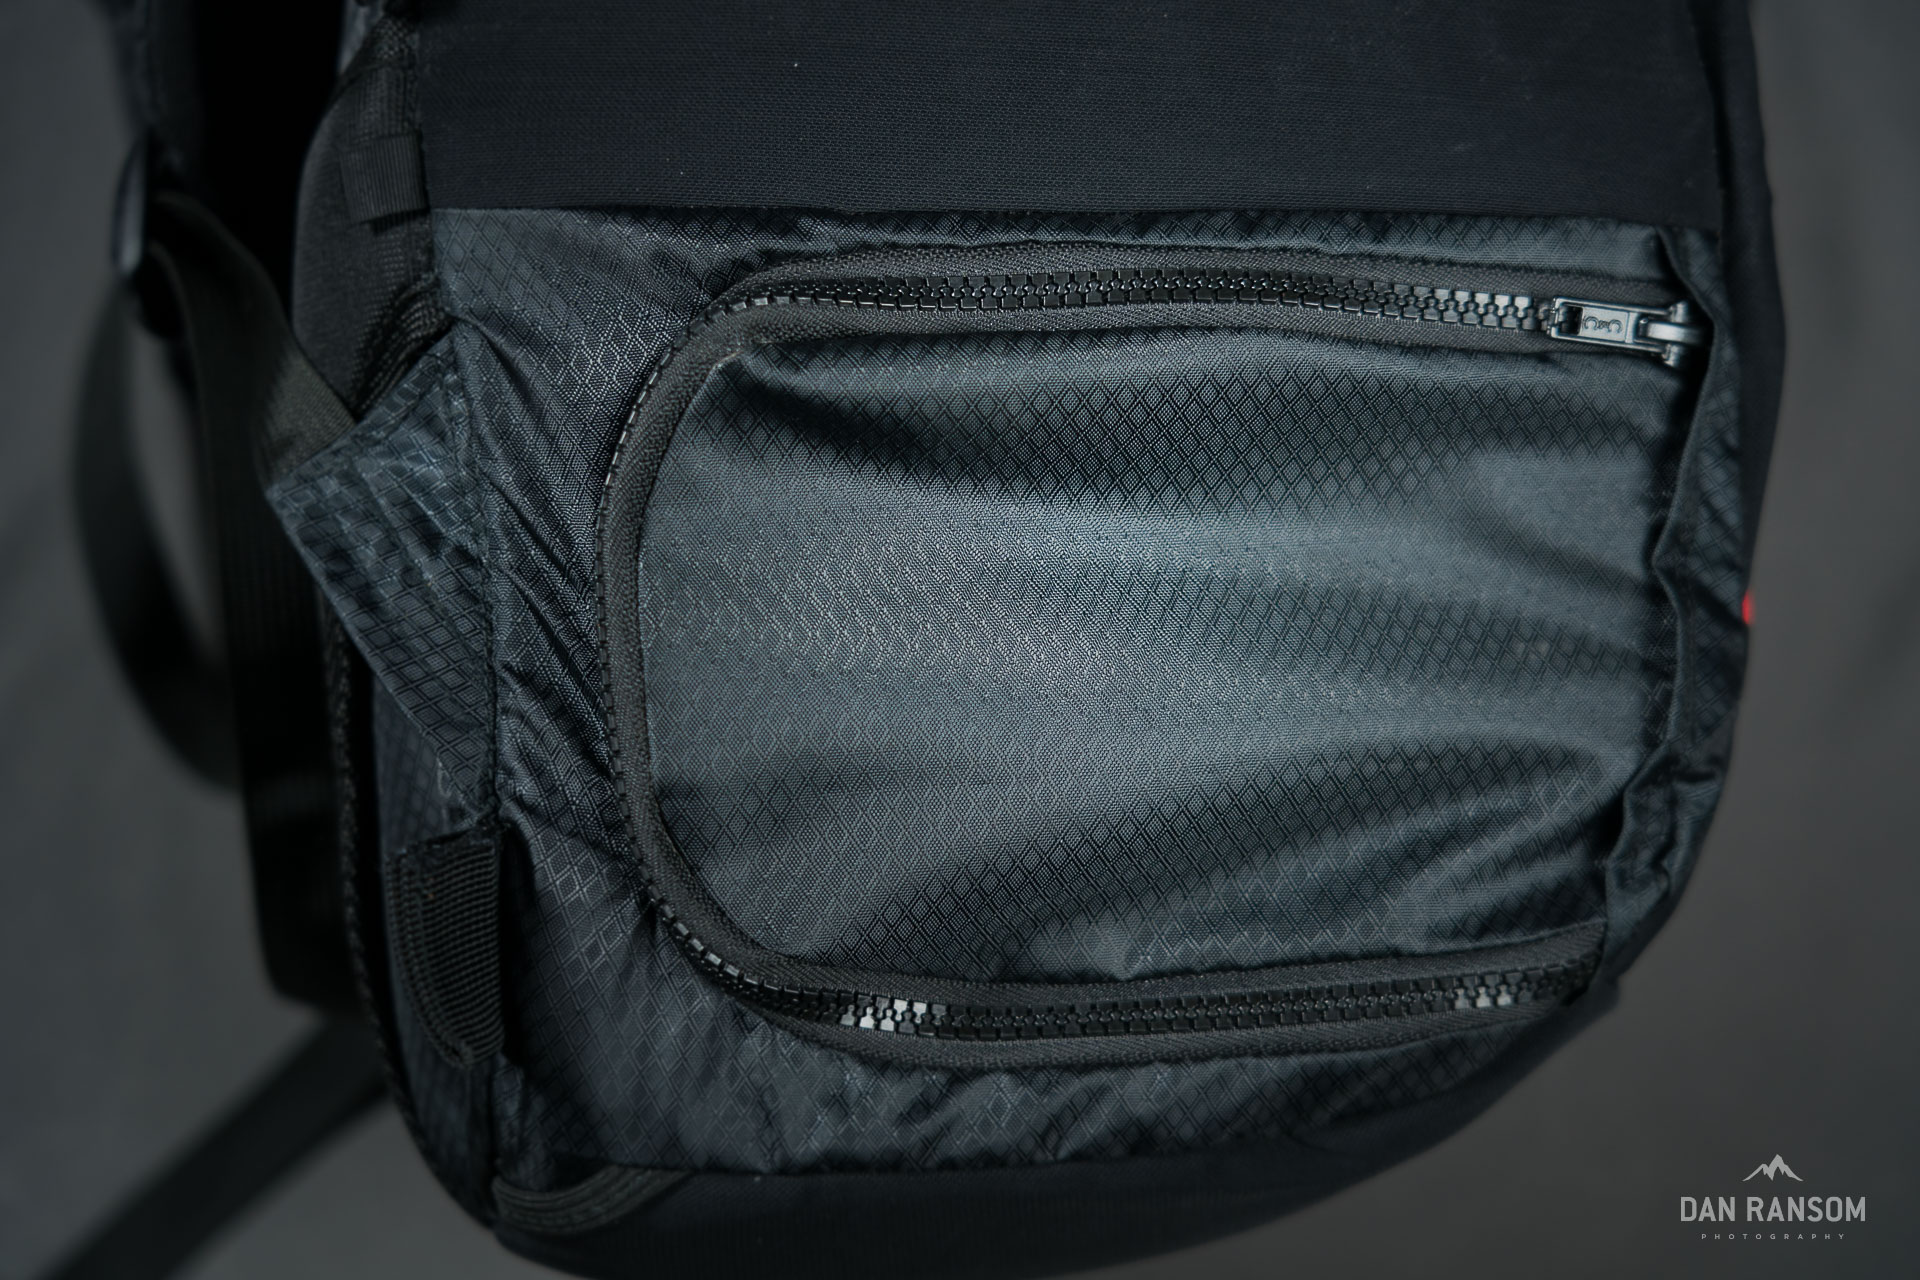
The majority of the heavy lifting was done with the camera-centric features. This consisted of two pieces – the exterior zip access, and the interior fully padded camera insert. For the exterior access panel I went with a #5 zipper because I thought it would functionally be the most simple, it would look the cleanest, and easiest to actually execute on a sewing machine.
That was naive. Zippers are a pain in the ass in this instance because the curve of the zipper needs to be on a plane that is perpendicular to the plane of the panel while it’s turning (otherwise the zipper binds). I drew this up in illustrator originally, sewed it up, and then realized everything was offset incorrectly because of this zipper rotation and the perpendicular seam allowance when the zipper rotates. In retrospect, this probably would have been much better to mock up on muslin or something before going straight to finished fabric. But hey, I’m a novice.
I tinkered with a variety of other concepts for this panel panel but they all had obvious drawbacks, including my own skill. I considered a fidlock buckle and hinge (which I still think is a viable option) but decided against it because of concerns with weather and dust protection.
That said, the biggest drawback of this whole zipper assembly is what to do if it rains. The zipper itself is not waterproof, and so currently the only solution would be to drybag the camera on the inside or use some sort of rain cover on the outside. More thought is needed here, but if I decide to sew a second version of this beast, I’d almost certainly just add a waterproof zipper and seal the seams, and probably have a clip-away storm flap. Even still, zippers are never 100 percent, so an inner drybag might still have to be added.
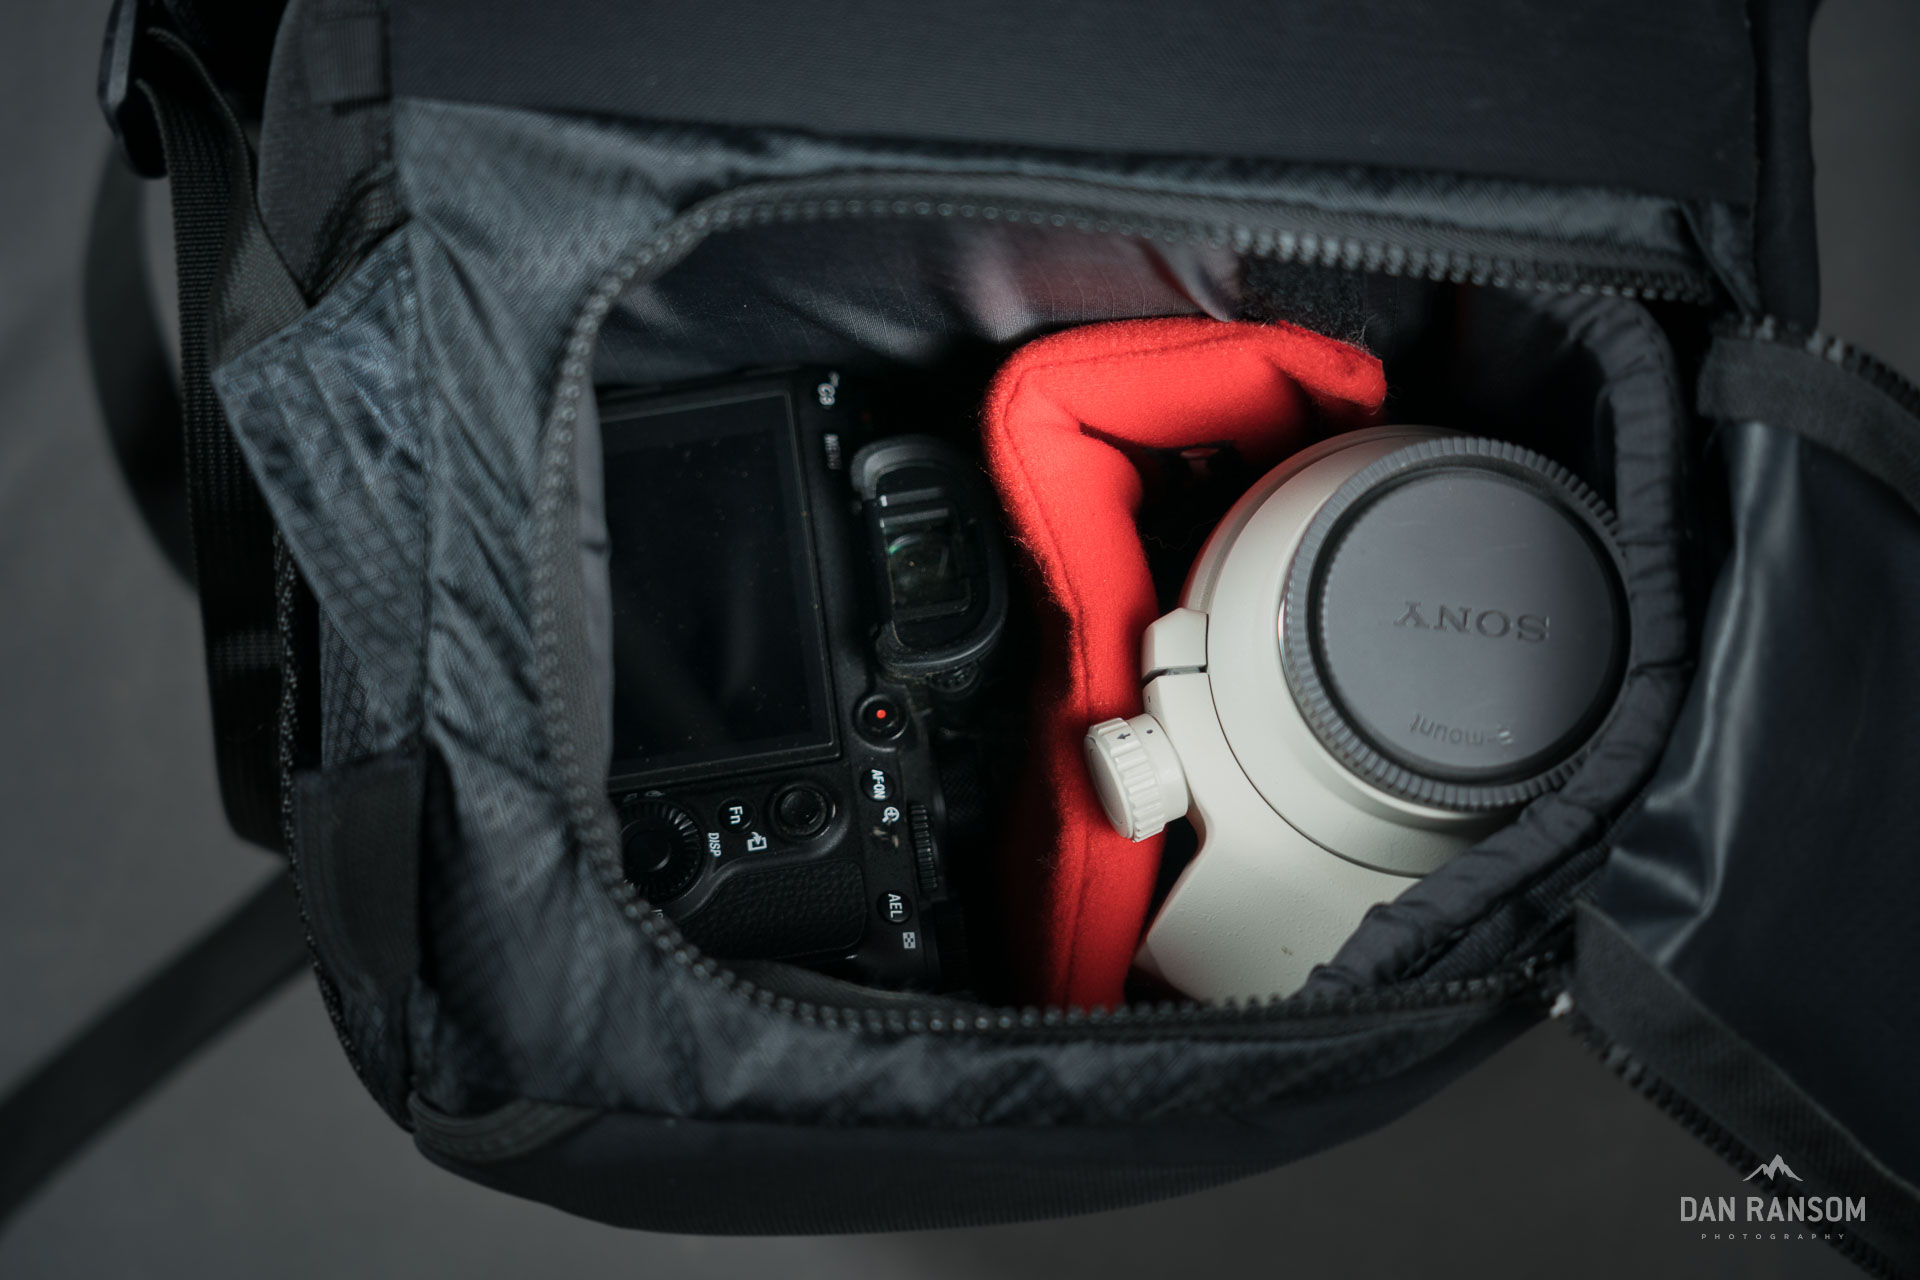
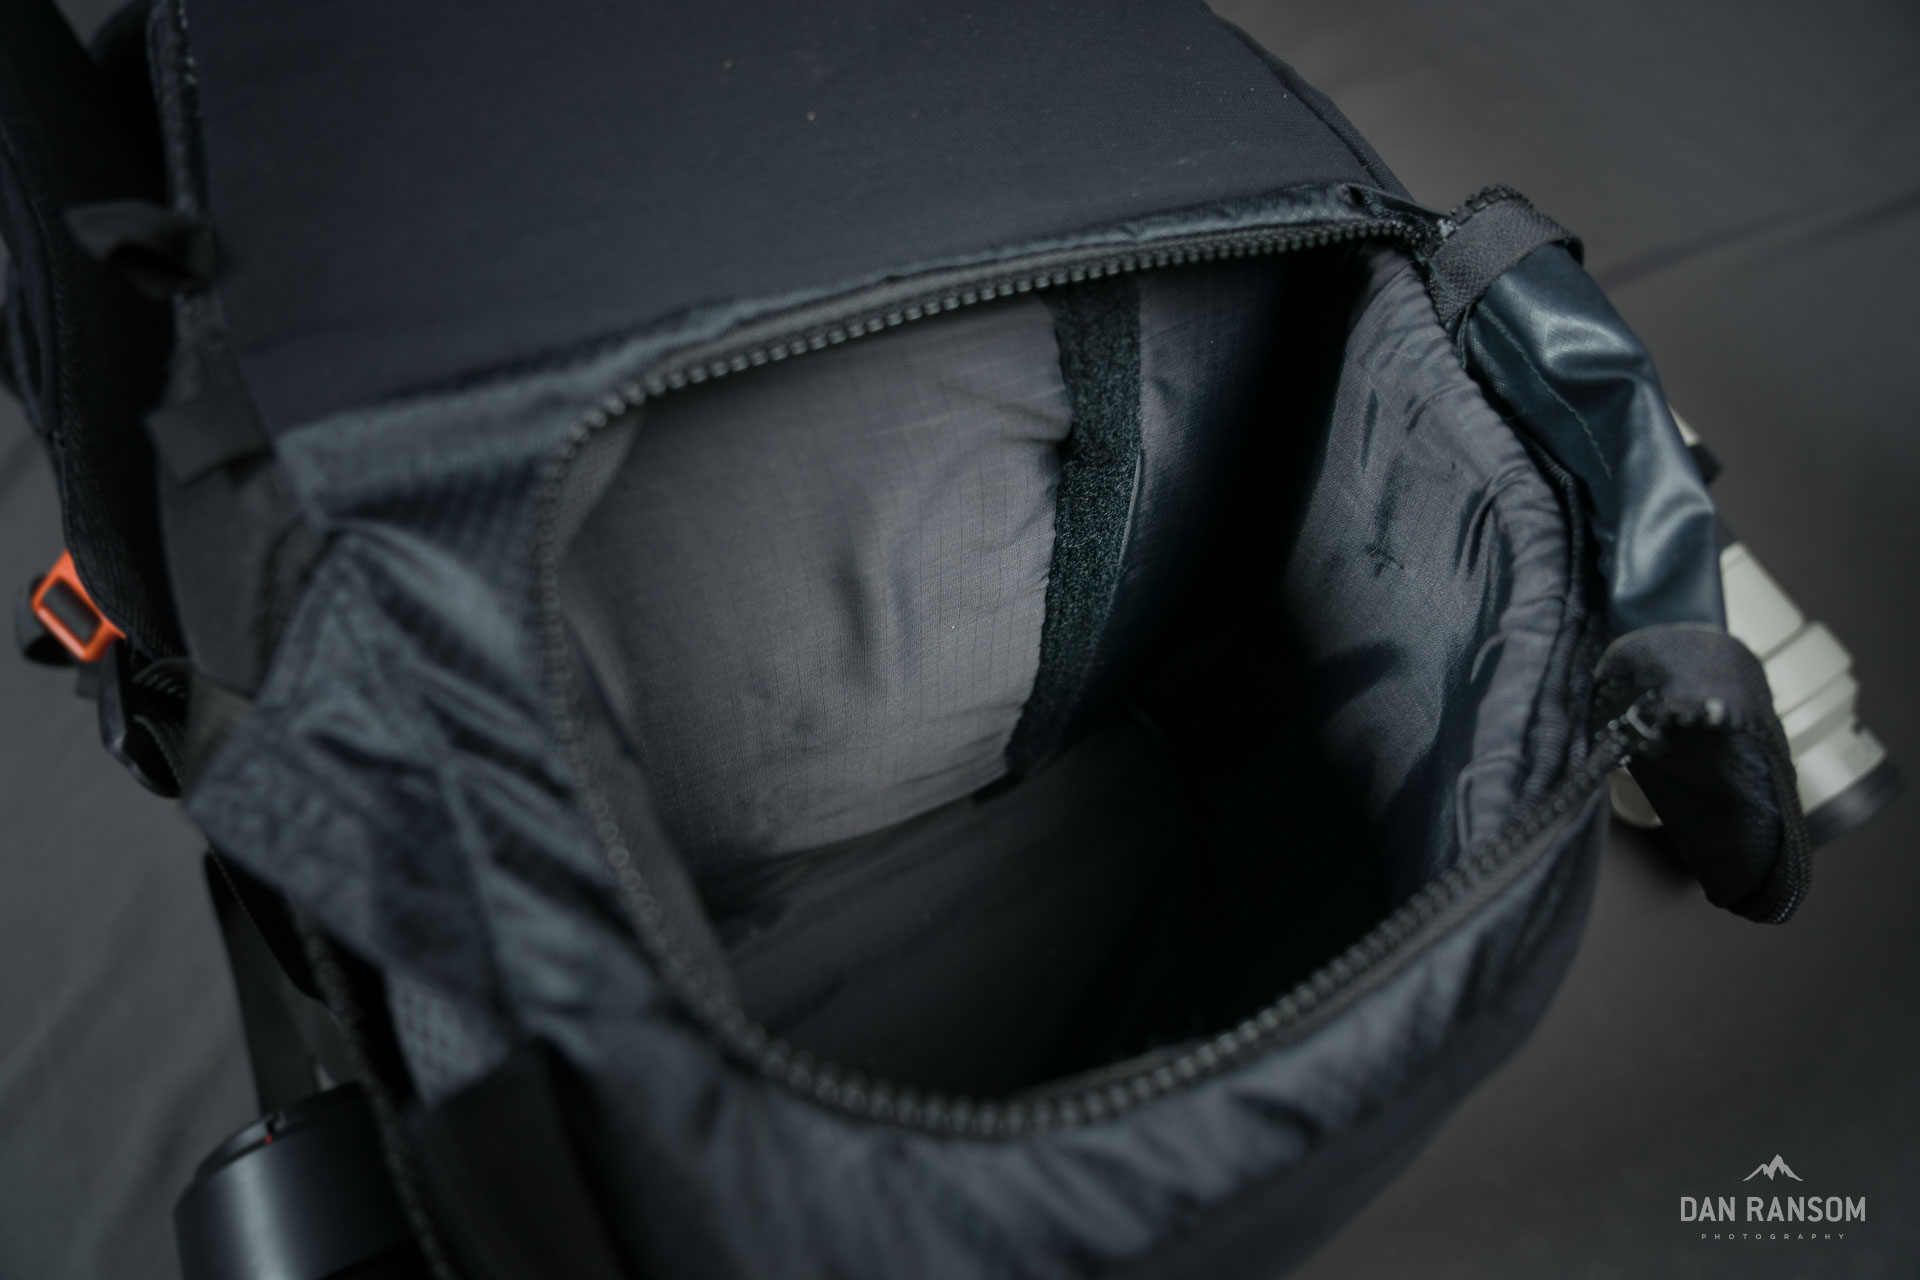
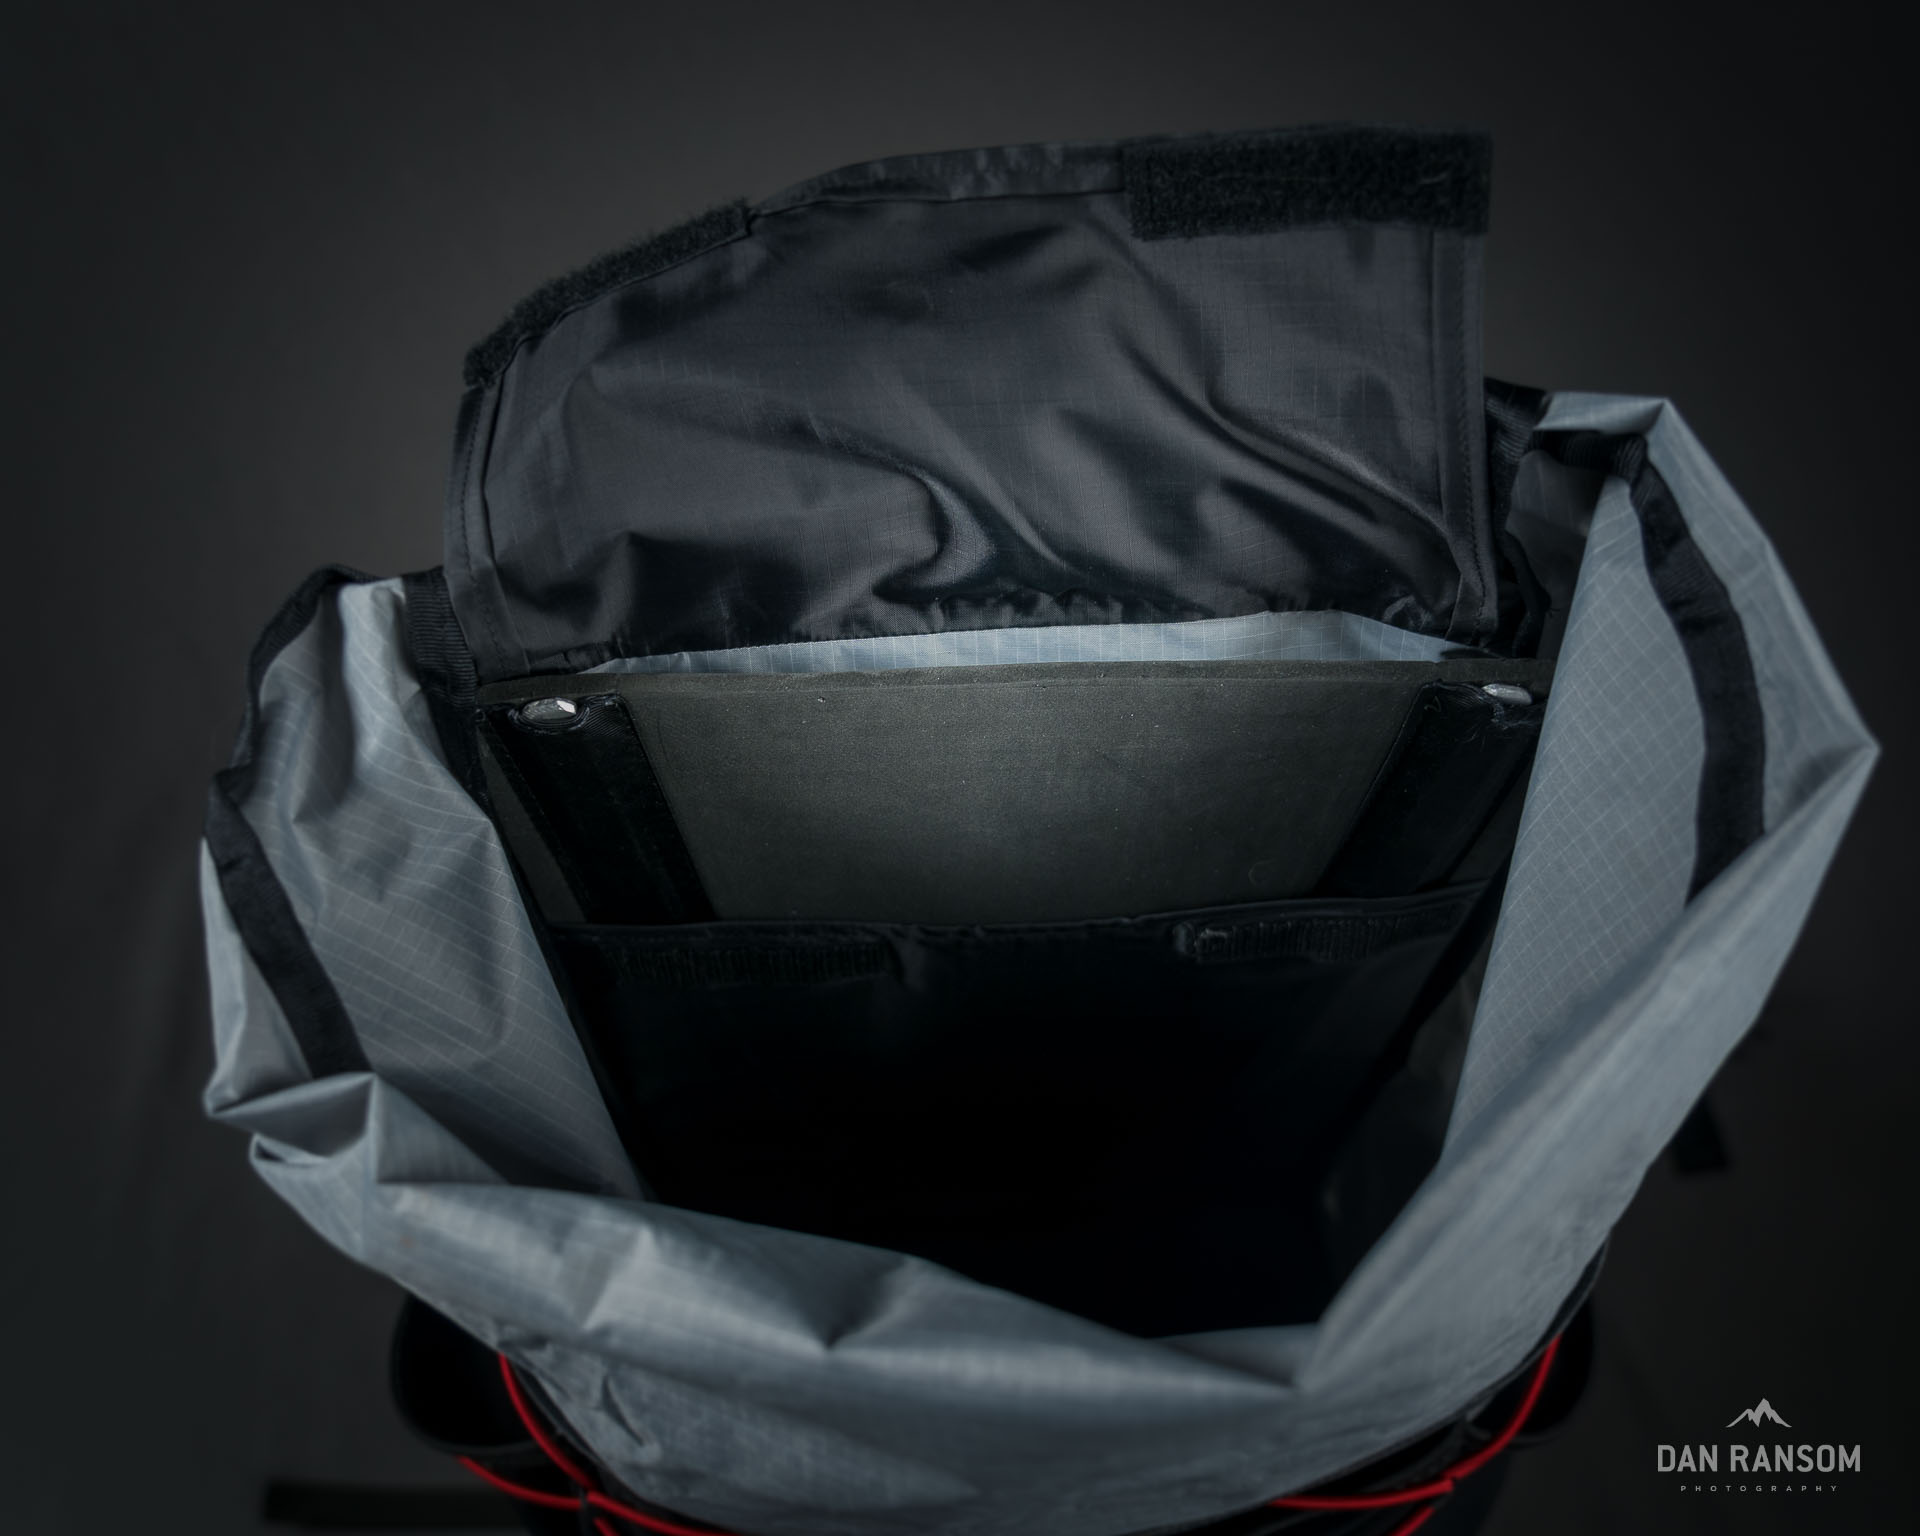
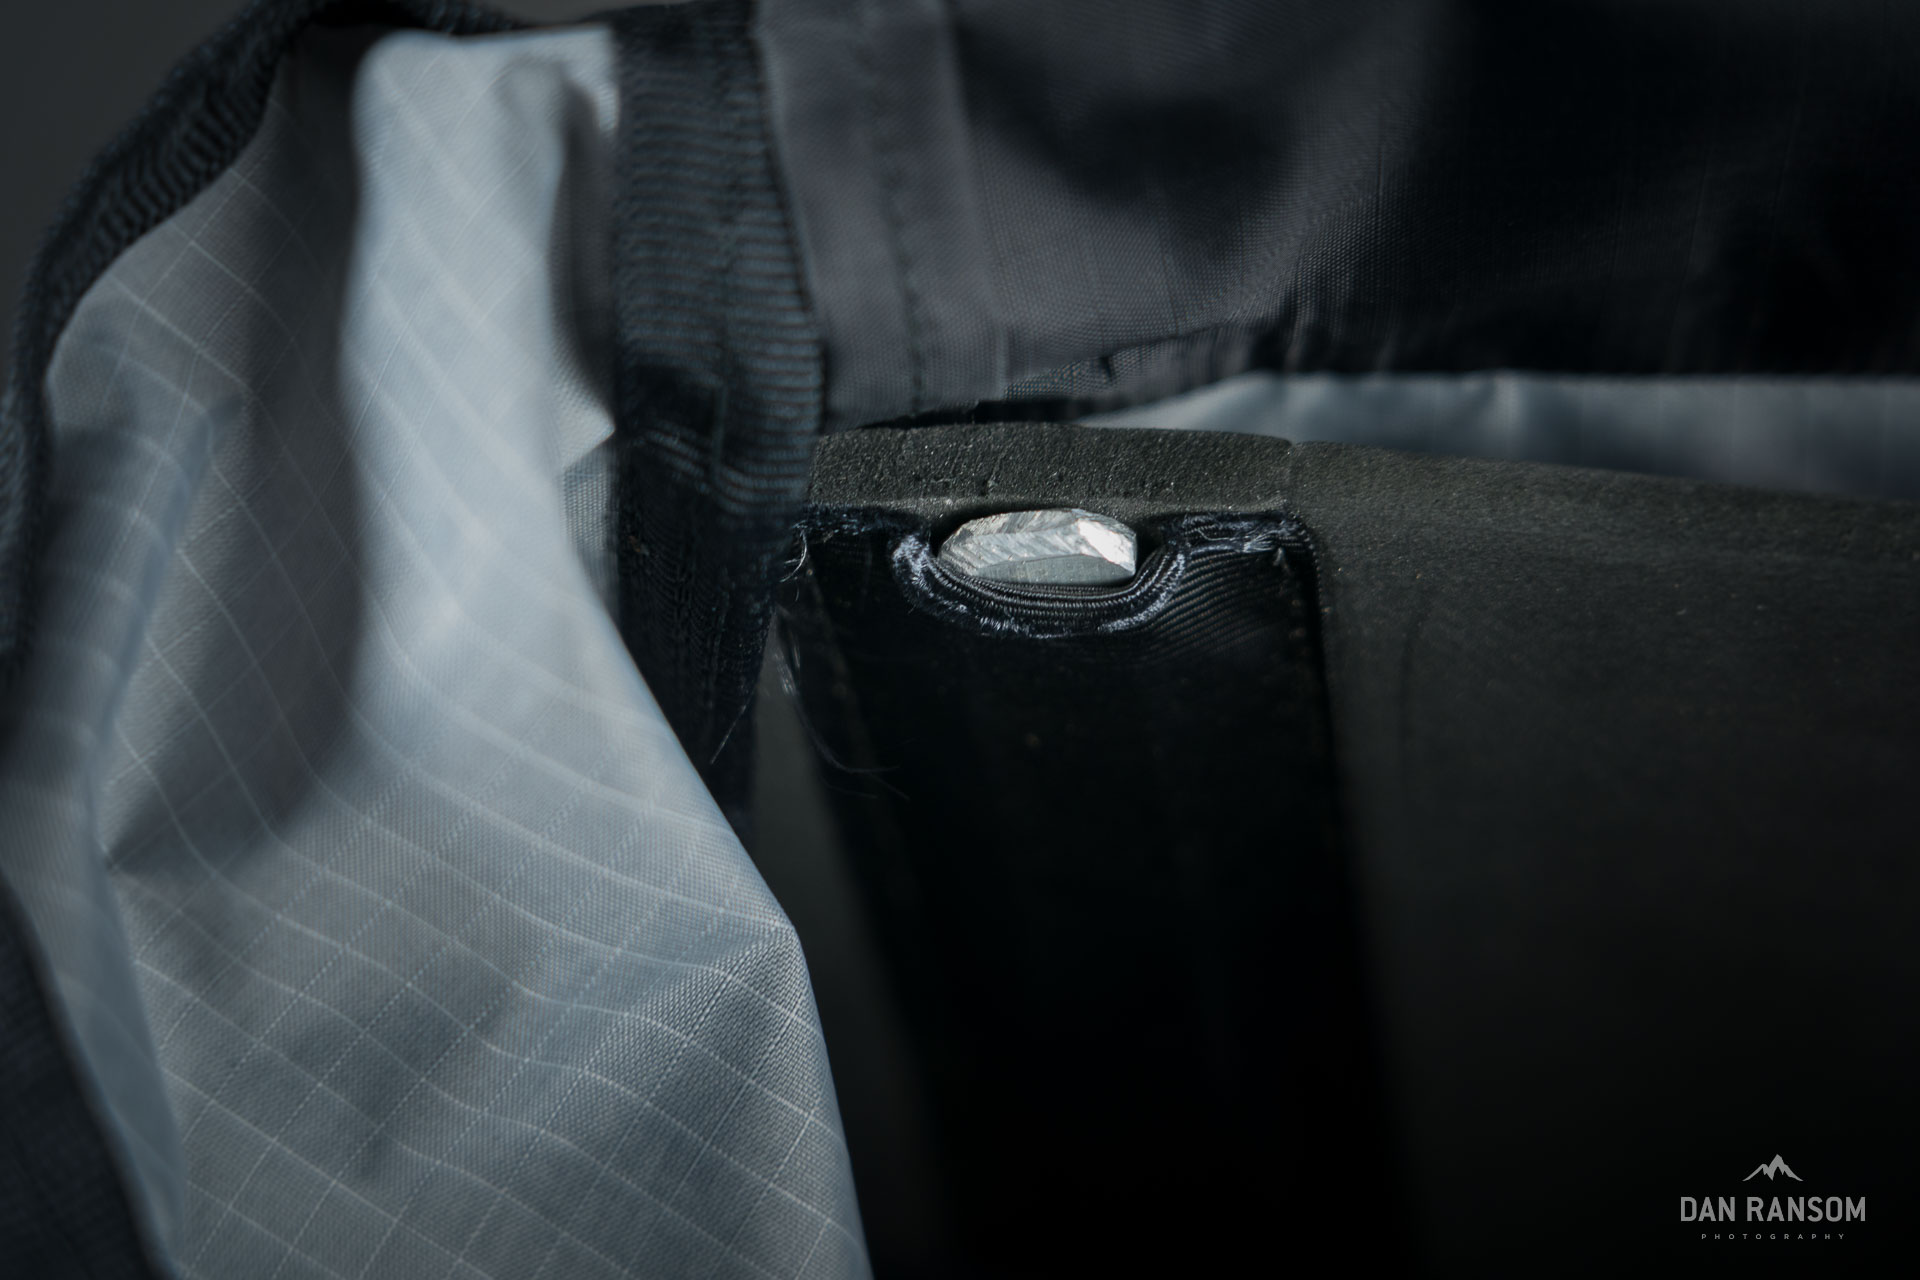
The next challenge was making a padded camera insert that can both protect the camera, and provide structure to the bottom of the bag to support all the load that will be carried on top of it. I solved this with a semi-rigid box made of ⅜ EVA foam, and the top panel of the box secured to all four sides of the pack with velcro. The velcro isn’t particularly strong, especially when you are stuffing gear in the pack, but it does help the pack hold it’s designed shape while the foam box provides the structure. (It also effectively seals the two compartments so you don’t lose that extra sock in a deep dark seam). I’m also experimenting with adding some interfacing or vinyl to the foam panels to stiffen them even more.
The biggest challenge of this whole padded insert process is figuring out the order of operations – when does velcro get sewed in, when does the zipper go in, when does the mesh pocket, and how to hide raw edges. I sat at the pattern table for hours ripping seams and recutting fabric trying to decide what should go where and when. I’m still surprisedI got it finished before this quarantine ends.
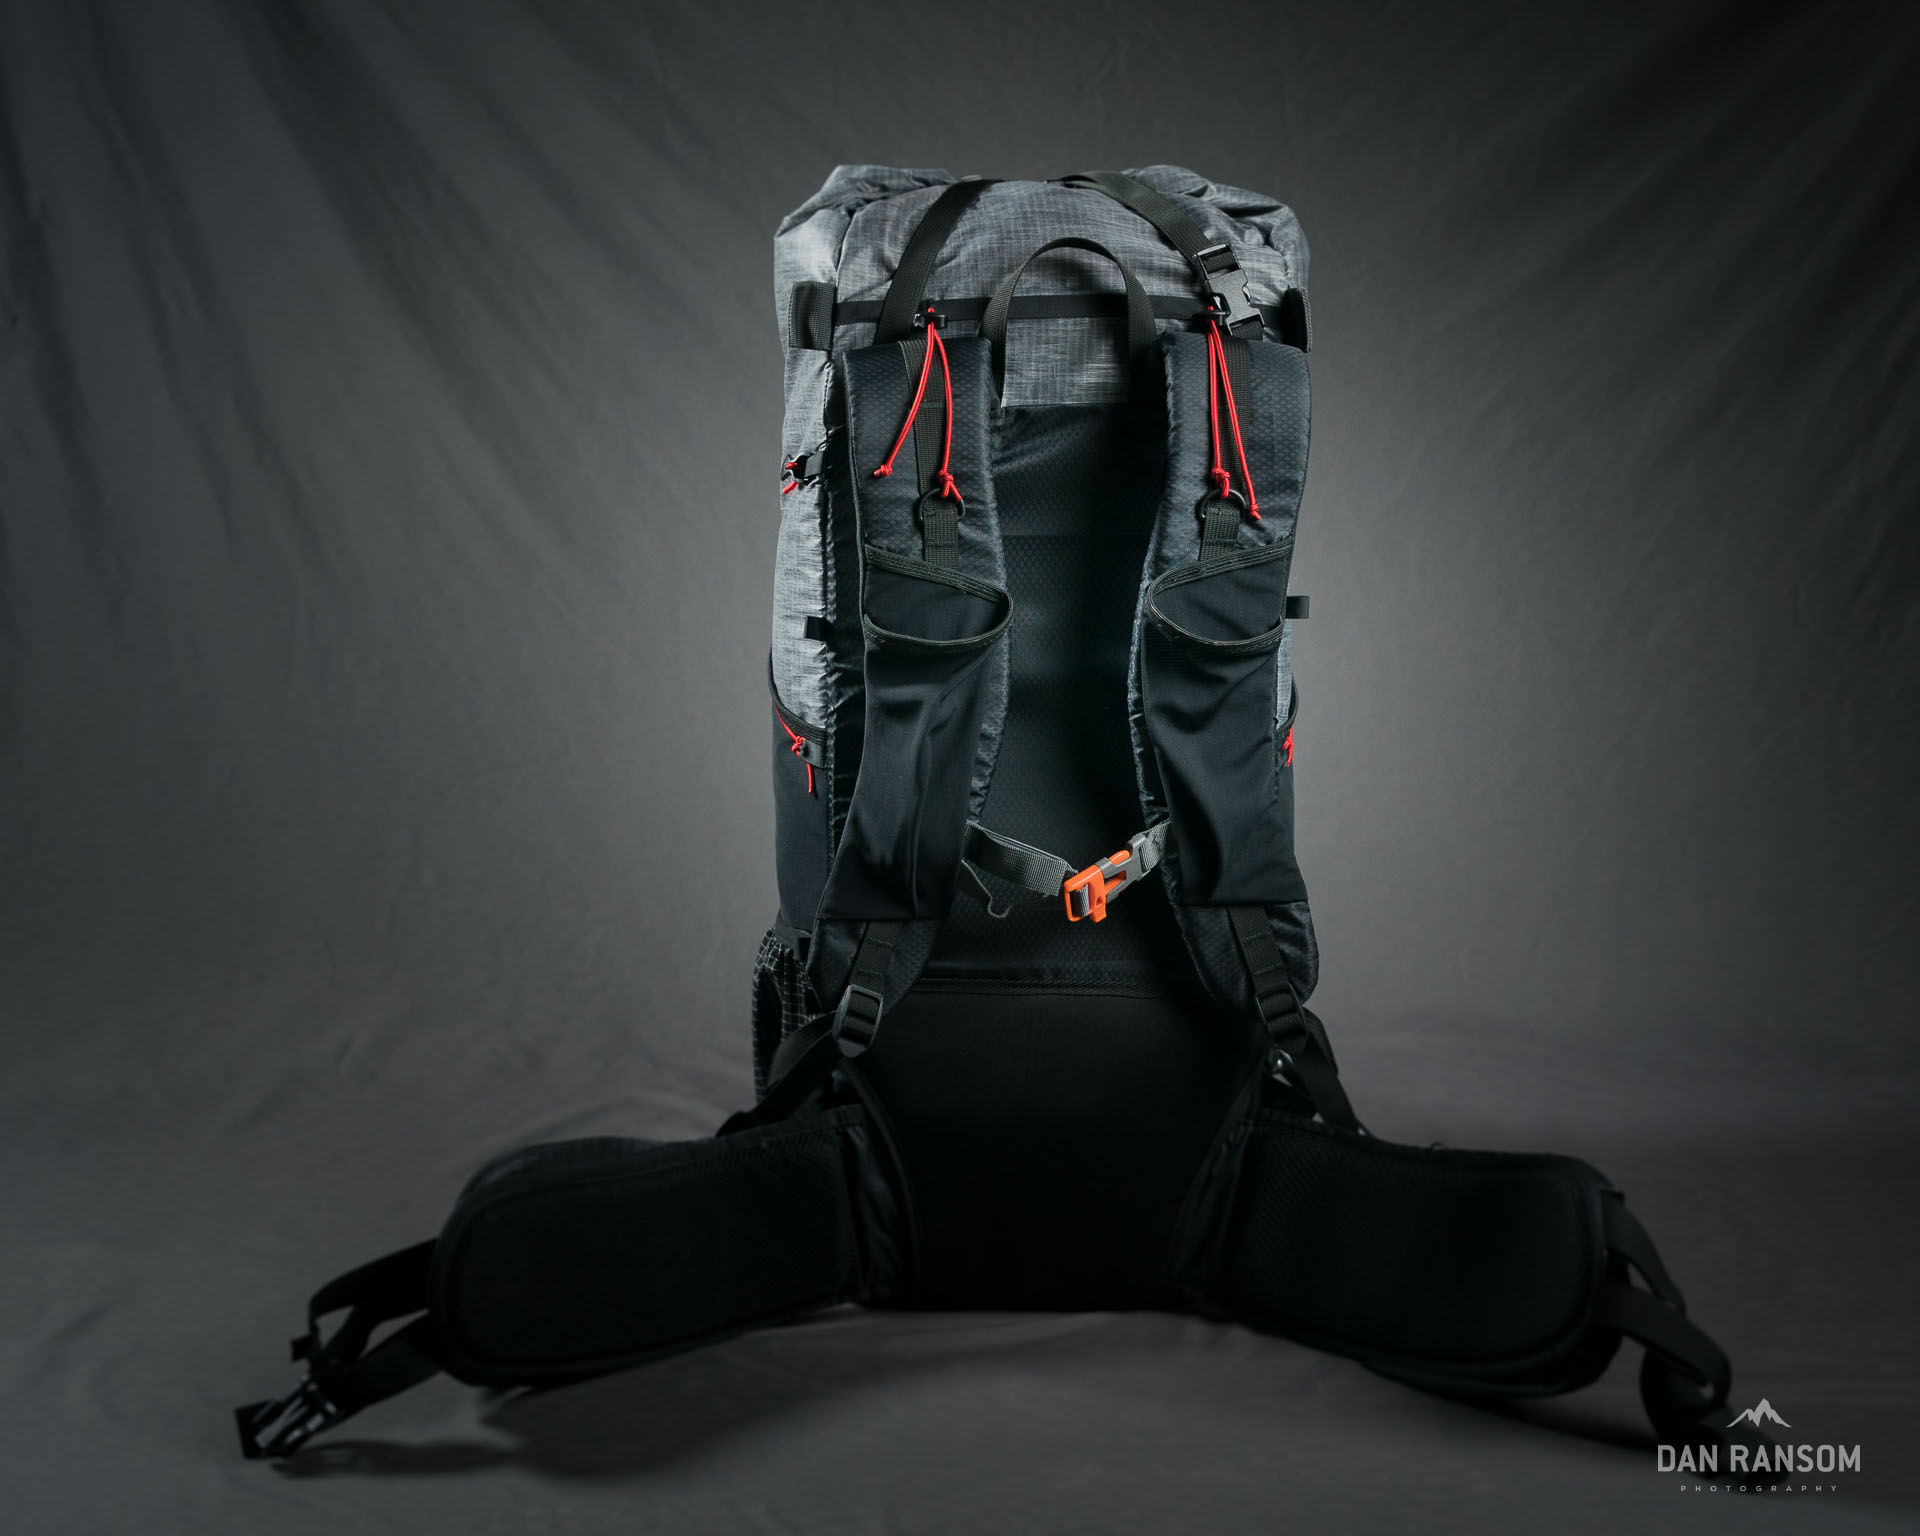
Suspension Design
I’m 6’1” with a 20.5 inch torso. Based on the many packs I have laying around right now, and the many different dimensions they all have, it was fairly straightforward to figure out what dimensions would fit me best. This meant diving into the Bag Buff Illustrator files and adding two inches of length to the back panel, and inversely shortening the top back panel by two inches to make sure everything stayed aligned.
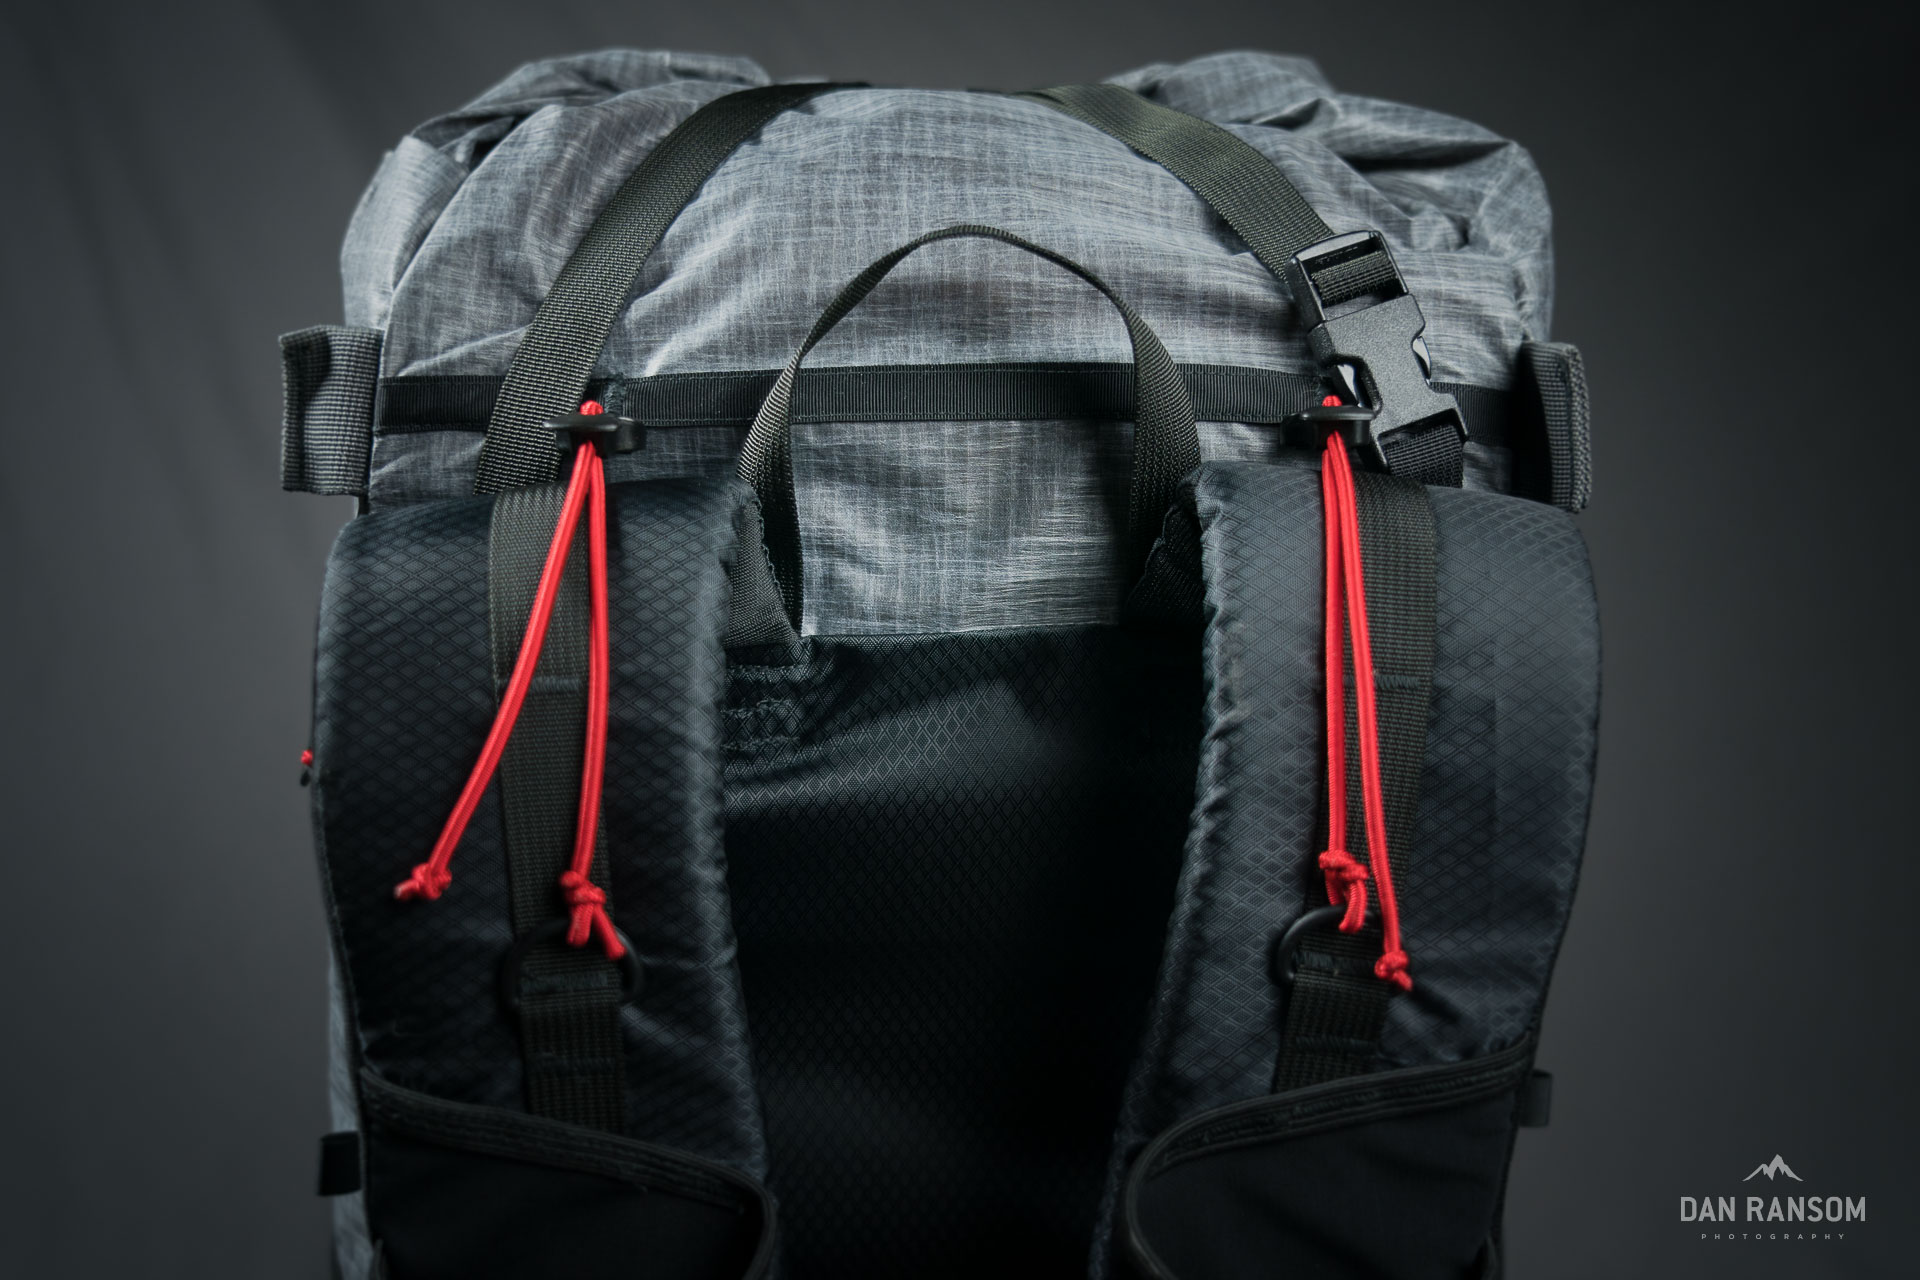
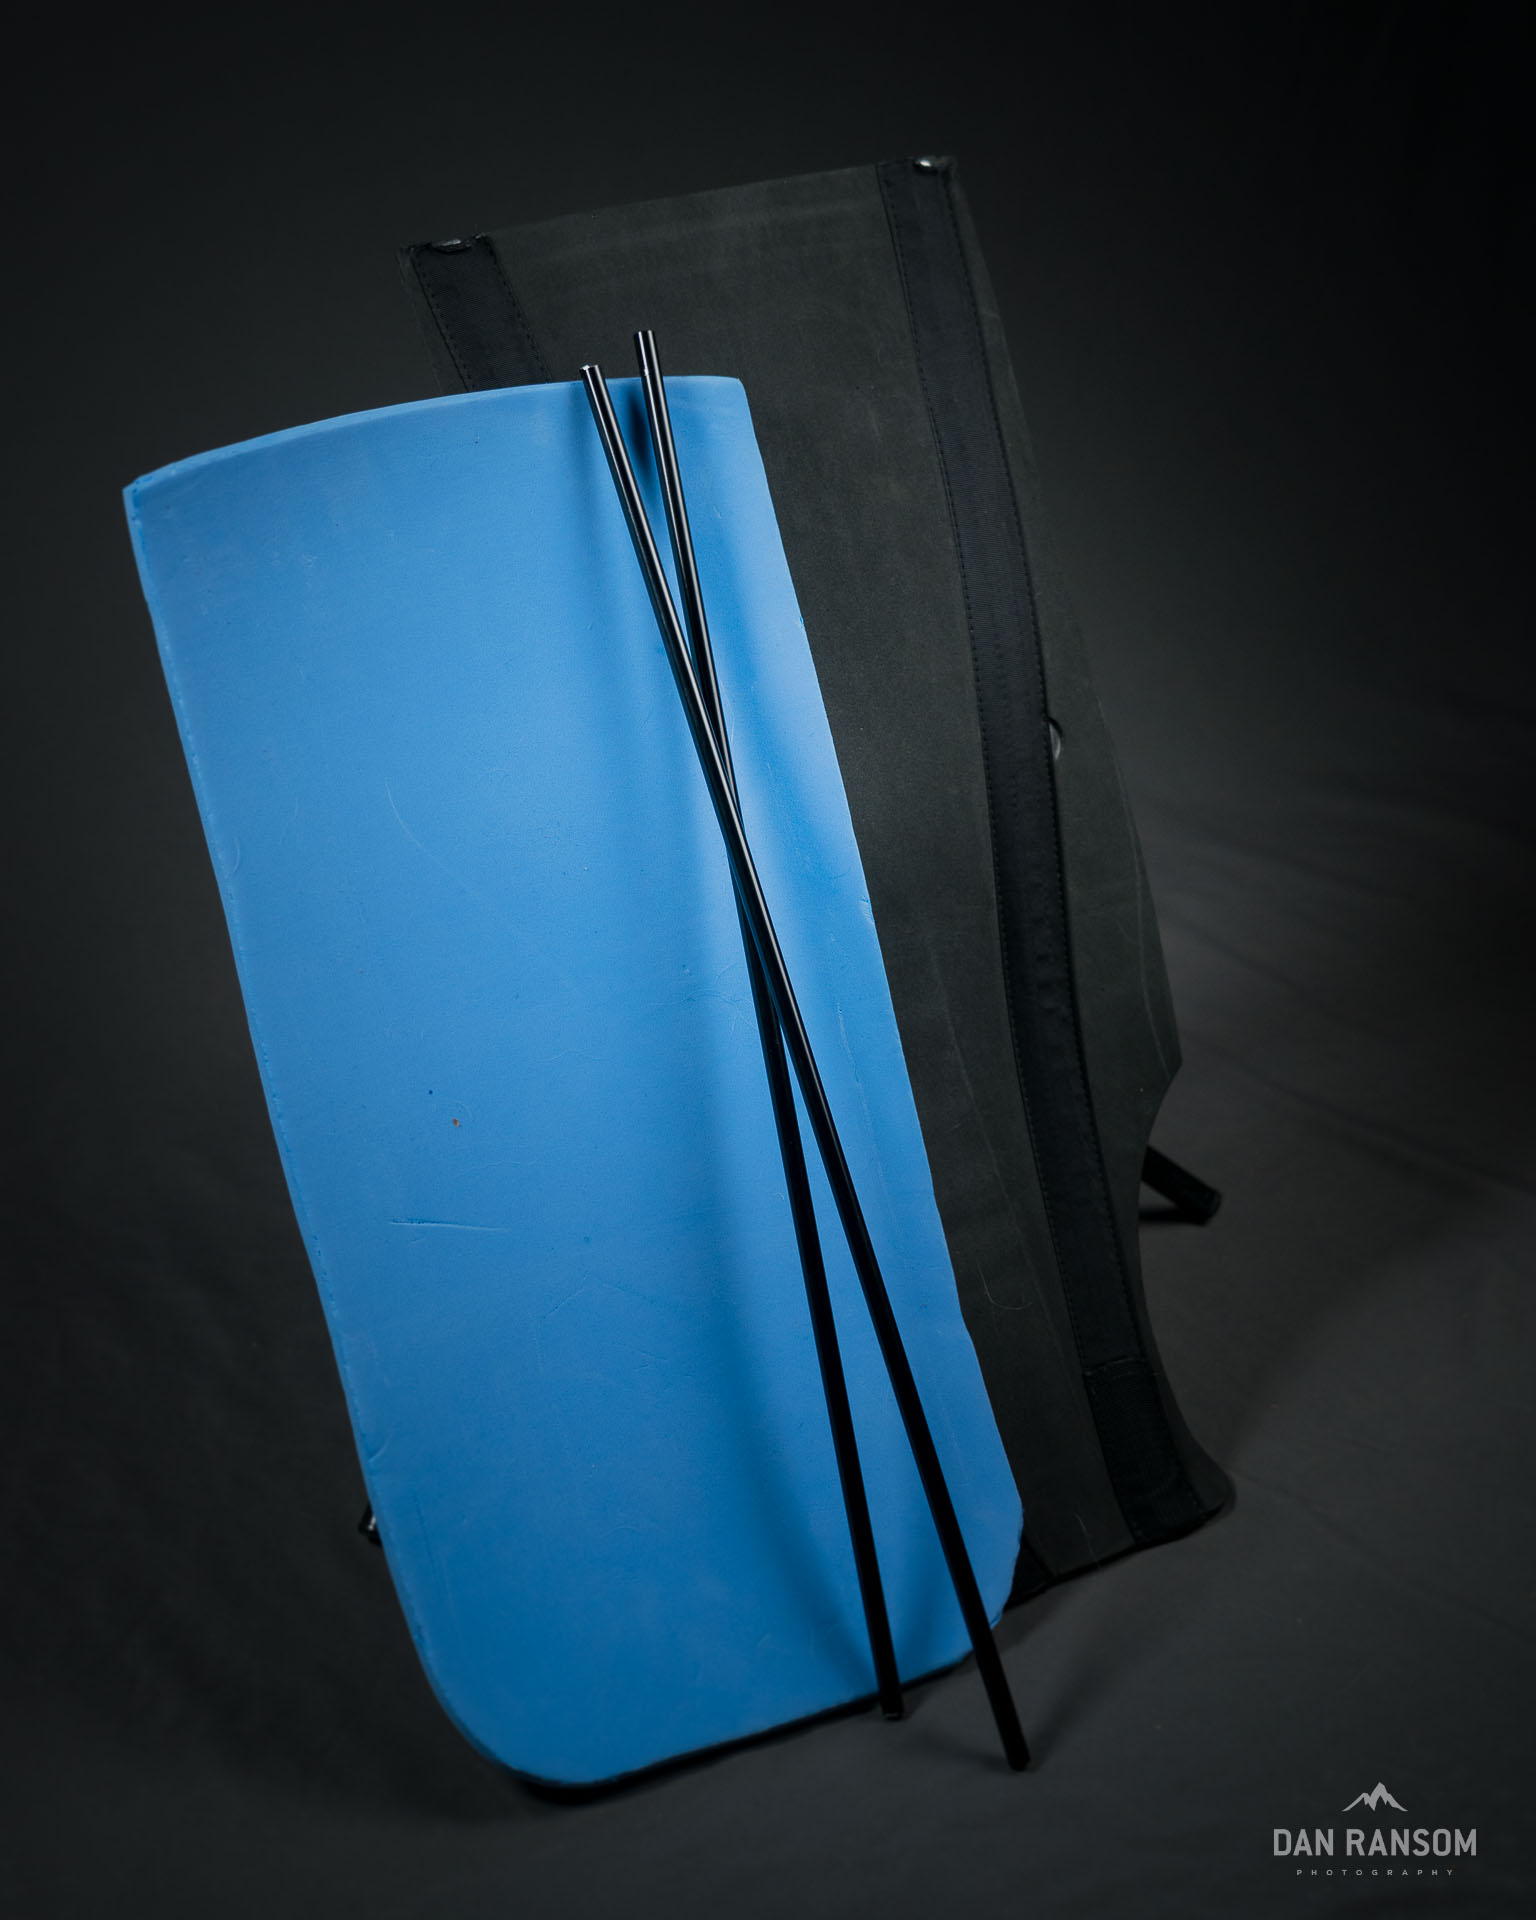
The big change to the suspension was adding modular functionality to the frame sheet. I did this by adding a lining layer with a velcro sleeve that various frame sheets can slide in and out. I cut a lightweight EVA backpanel, as well as a much more burly rigid foam panel with dual aluminum stays that was harvested from a ULA backpack. I cut this down width wise to match the sleeve and shortened the stays. Line Loc 3 loadlifters connect to the frame sheet for a bit more adjustability. I also built the option for “lightweight stays’ on the exterior of the pack ala KS Ultralight stayle. Overall, I think this is probably redundant with the other frame sheet options I already have, but they are much lighter than the internal stays, so I’m curious to try this design out.
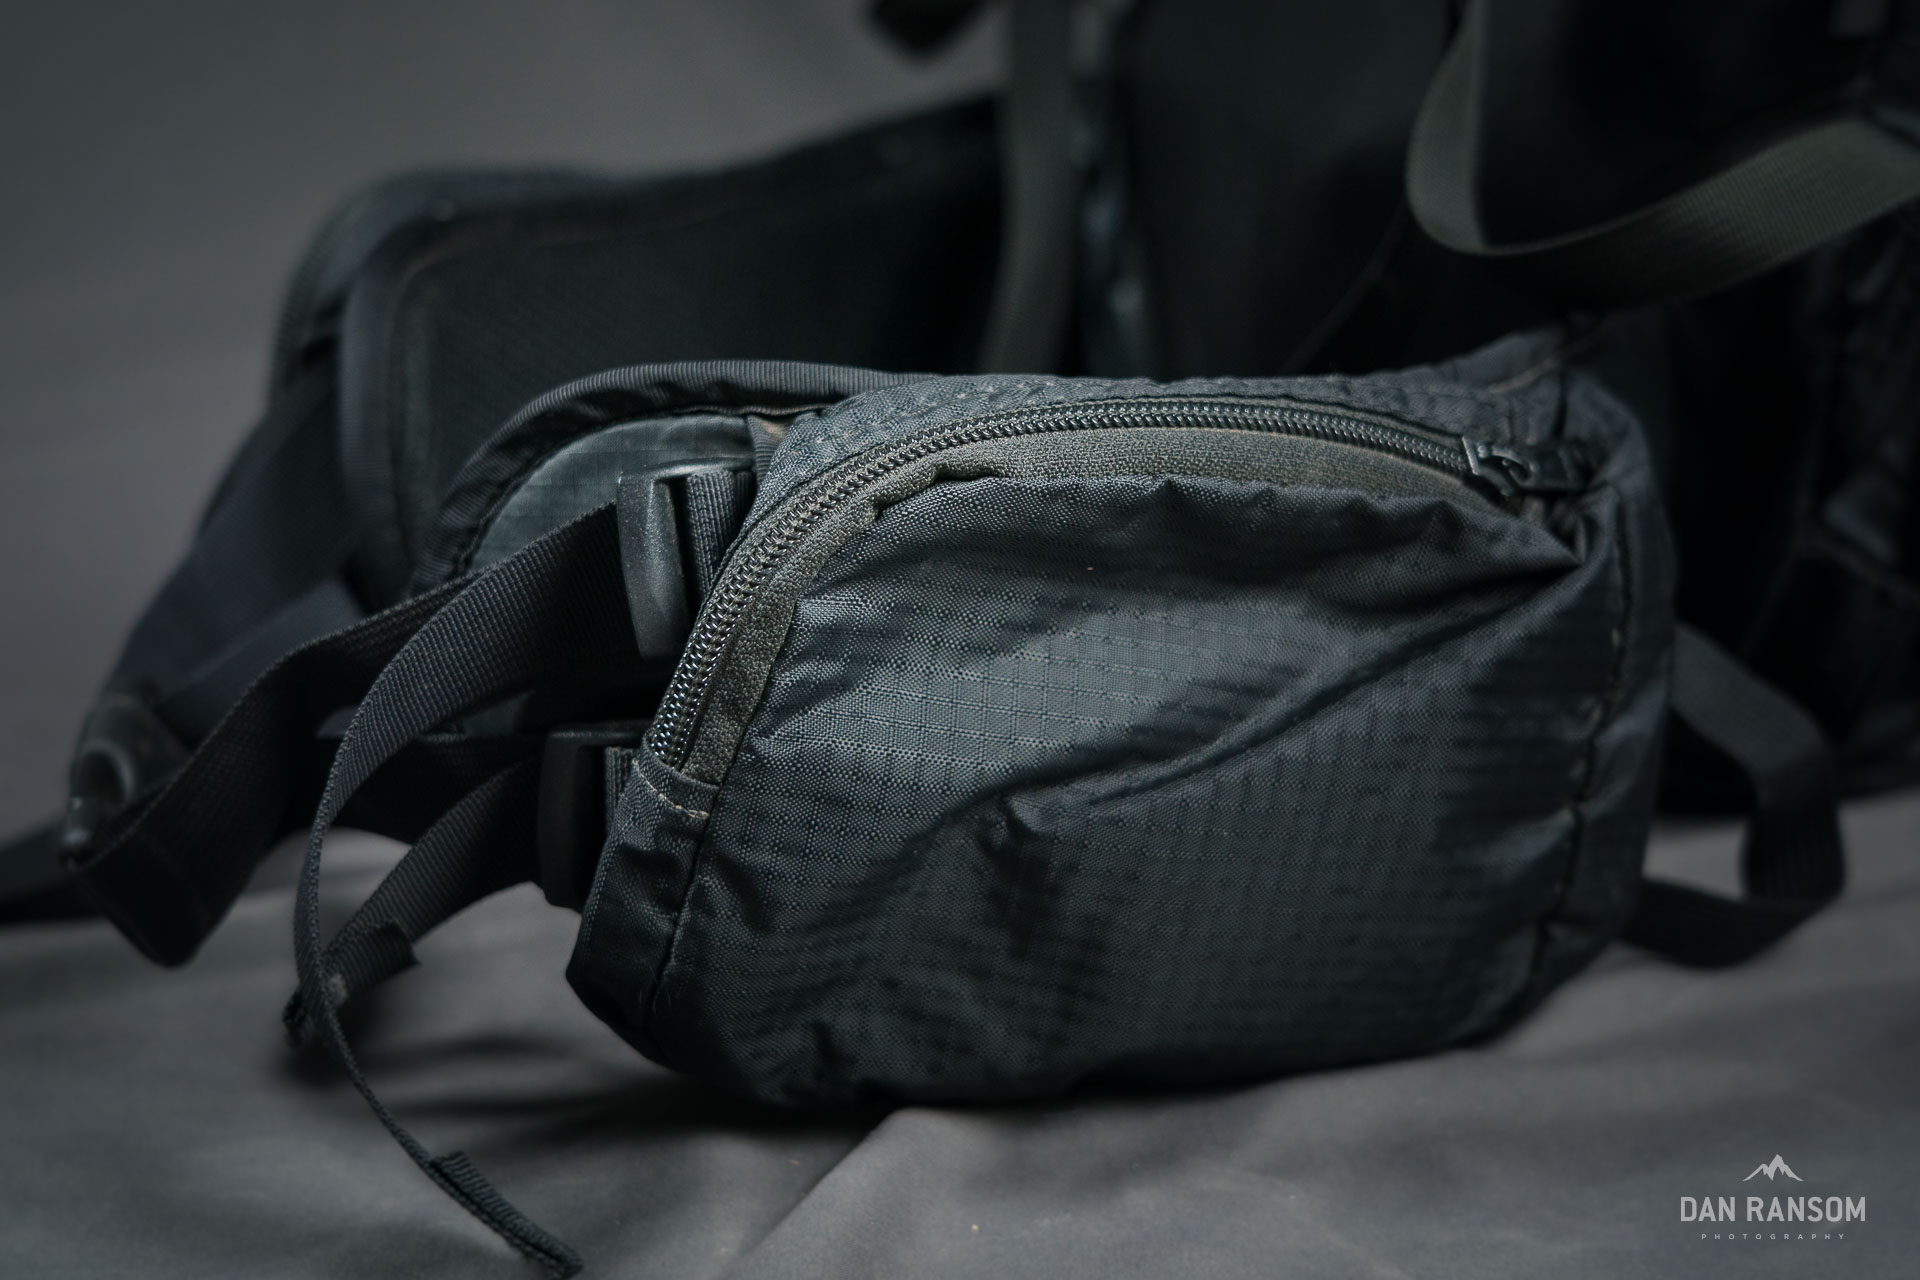
The final piece of the suspension puzzle is the removable hipbelt. In these photos, there is a modular hipbelt from my ULA Camino. The Camino is a panel loader which also makes a great photography pack, but it requires taking the pack off your back to get to the gear. Nonetheless, ULA makes killer gear, and I love the shape of their belts, the dual strap adjustments and inward pull. Oh yeah, and absolutely huge pockets. With the Mountain Flyer velcro connection, it makes swapping belts on and off easy. I do plan on building a much lighter belt with no pockets, but with a 36 inch waist I need to design one a bit bigger. The pockets are probably redundant with how many pockets are on the pack already.
Additional Features
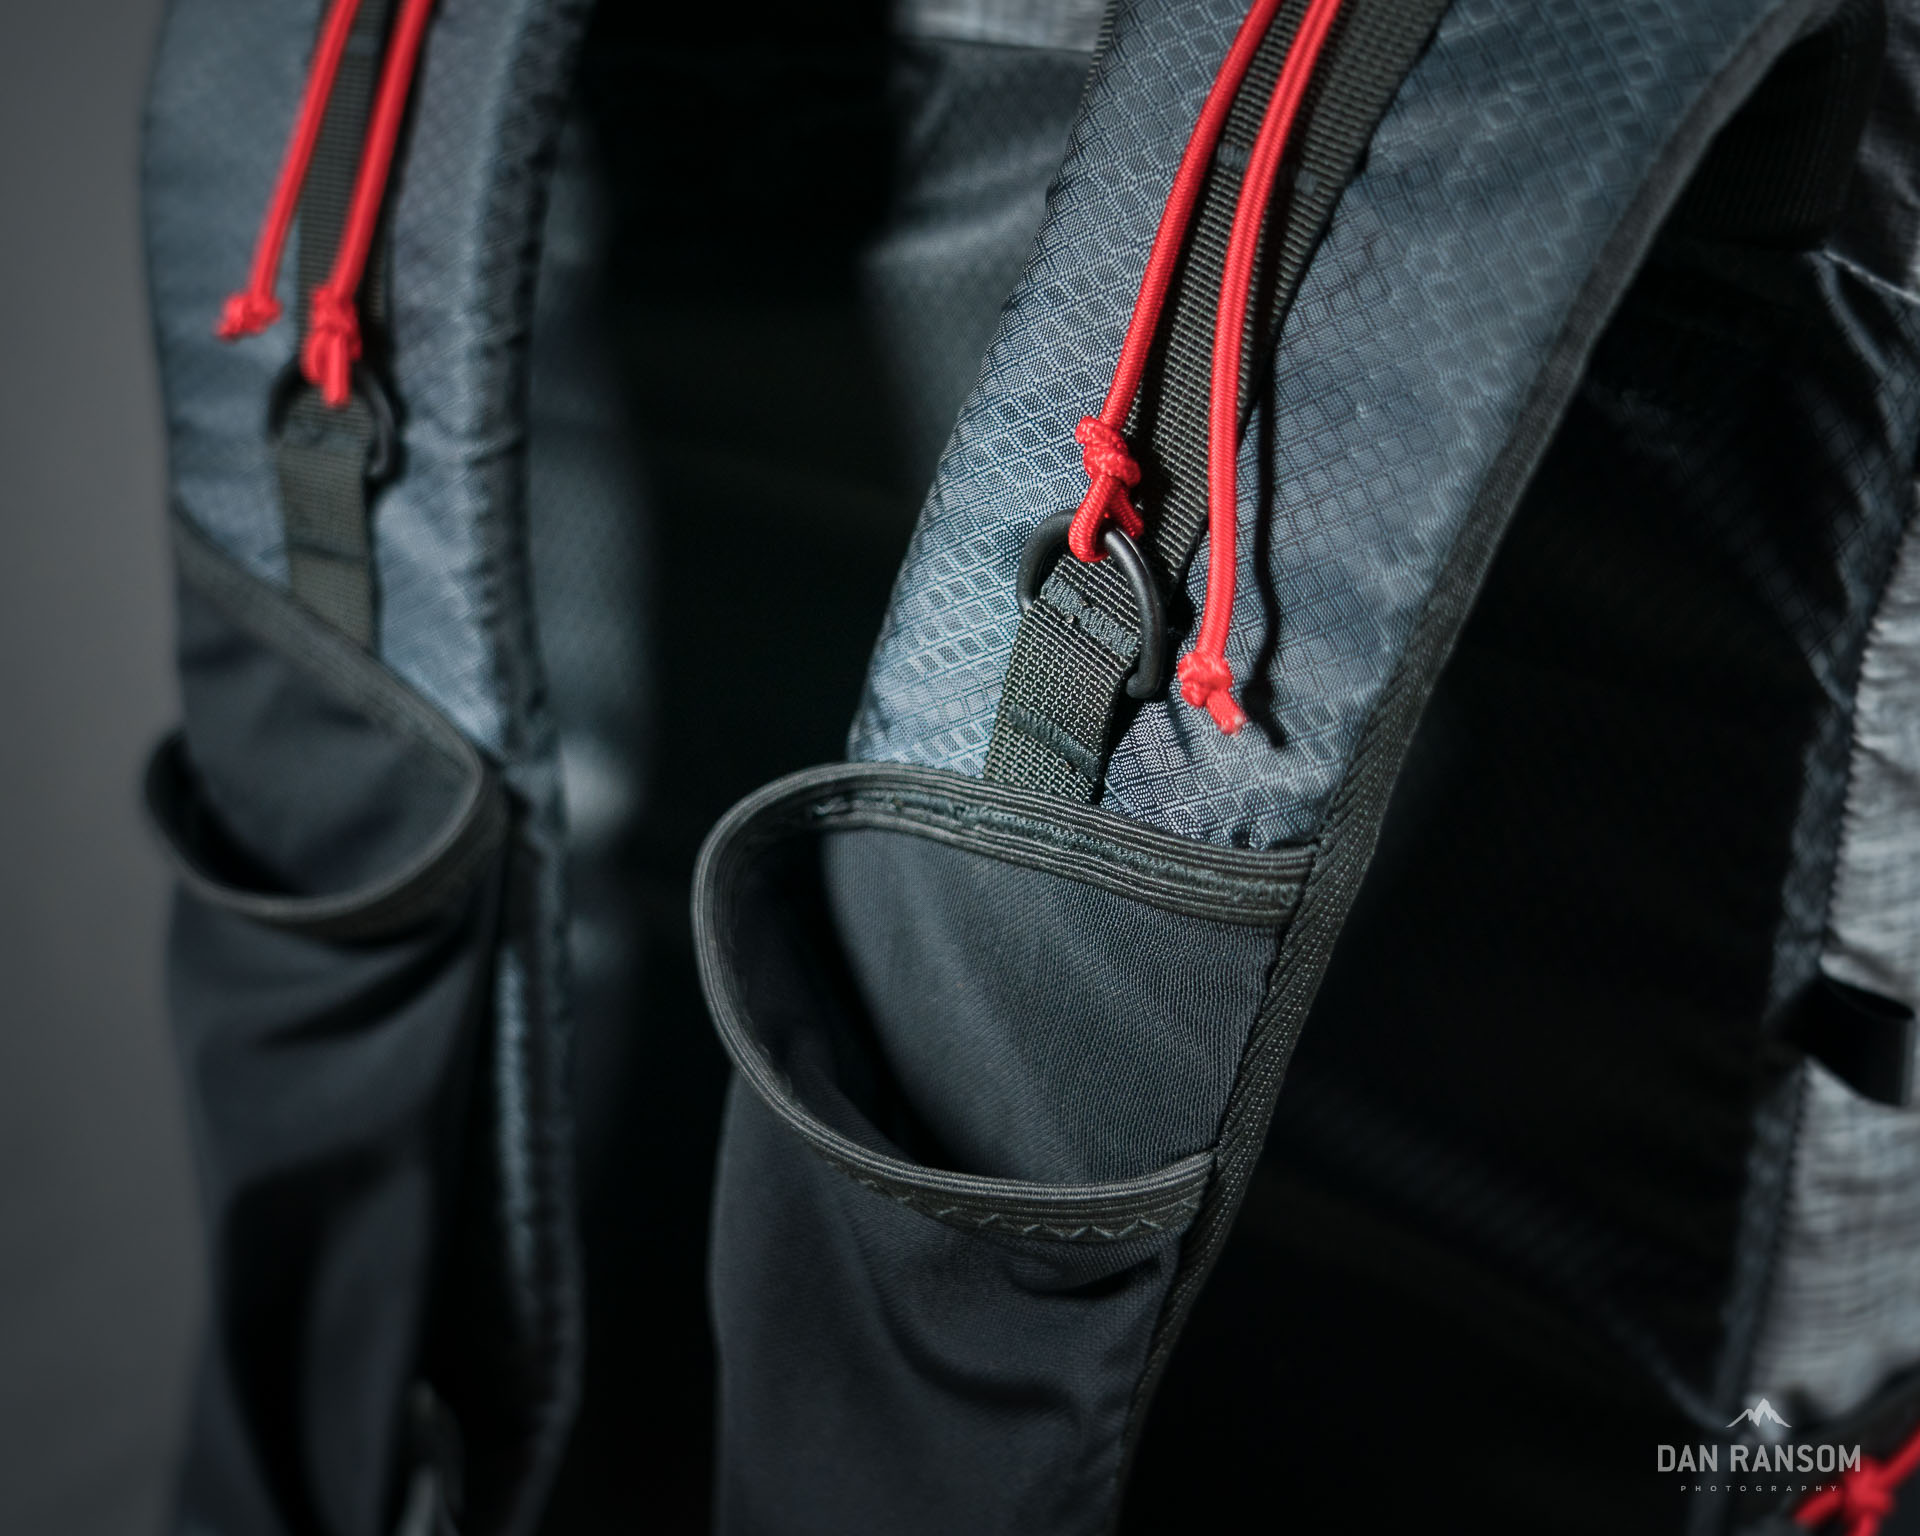
The next change was to make the shoulder pads roughly a half inch wider and one inch longer. I made multiple prototypes of straps with different widths before I settled this specific dimension. Again, easy changes to make in illustrator and print variations. The only real change to the Mountain Flyer straps (which I actually like pretty well) was adding shoulder stretch pockets.
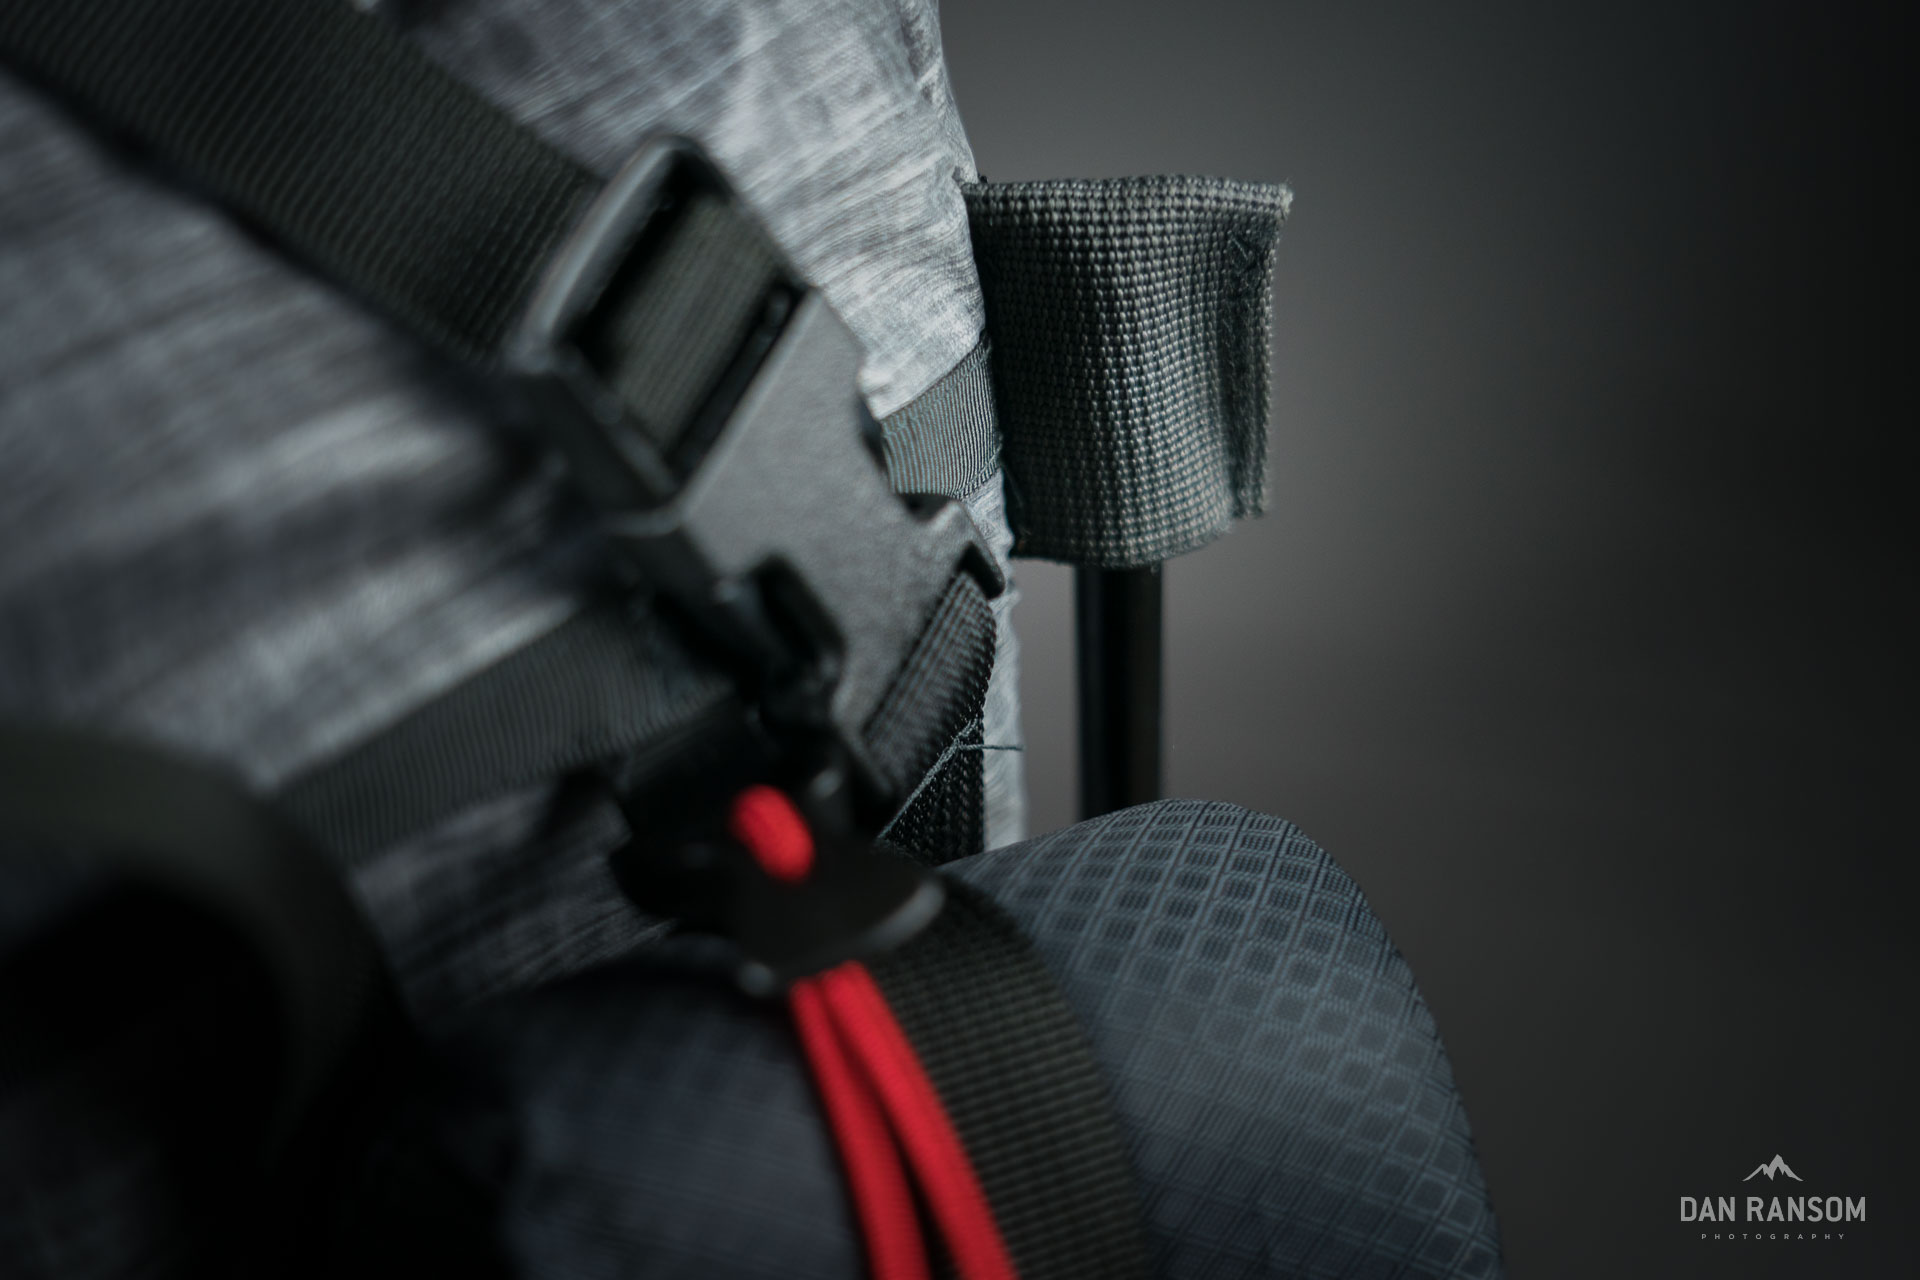
I also added additional elevated side pockets to the Mountain Flyer pattern. One of those is obvious because with the camera access panel, that pocket no longer exists. I decided to move this one 7 inches vertically, so if I had to carry water I could at least balance the load with the primary bottle on the other side. Of course, camera-side bottle won’t be accessible without taking the pack off, so not sure how this will play out on trail. The other elevated side pocket I slapped on there simply to make it symmetrical (even though it will never actually be symmetrical with the camera panel).
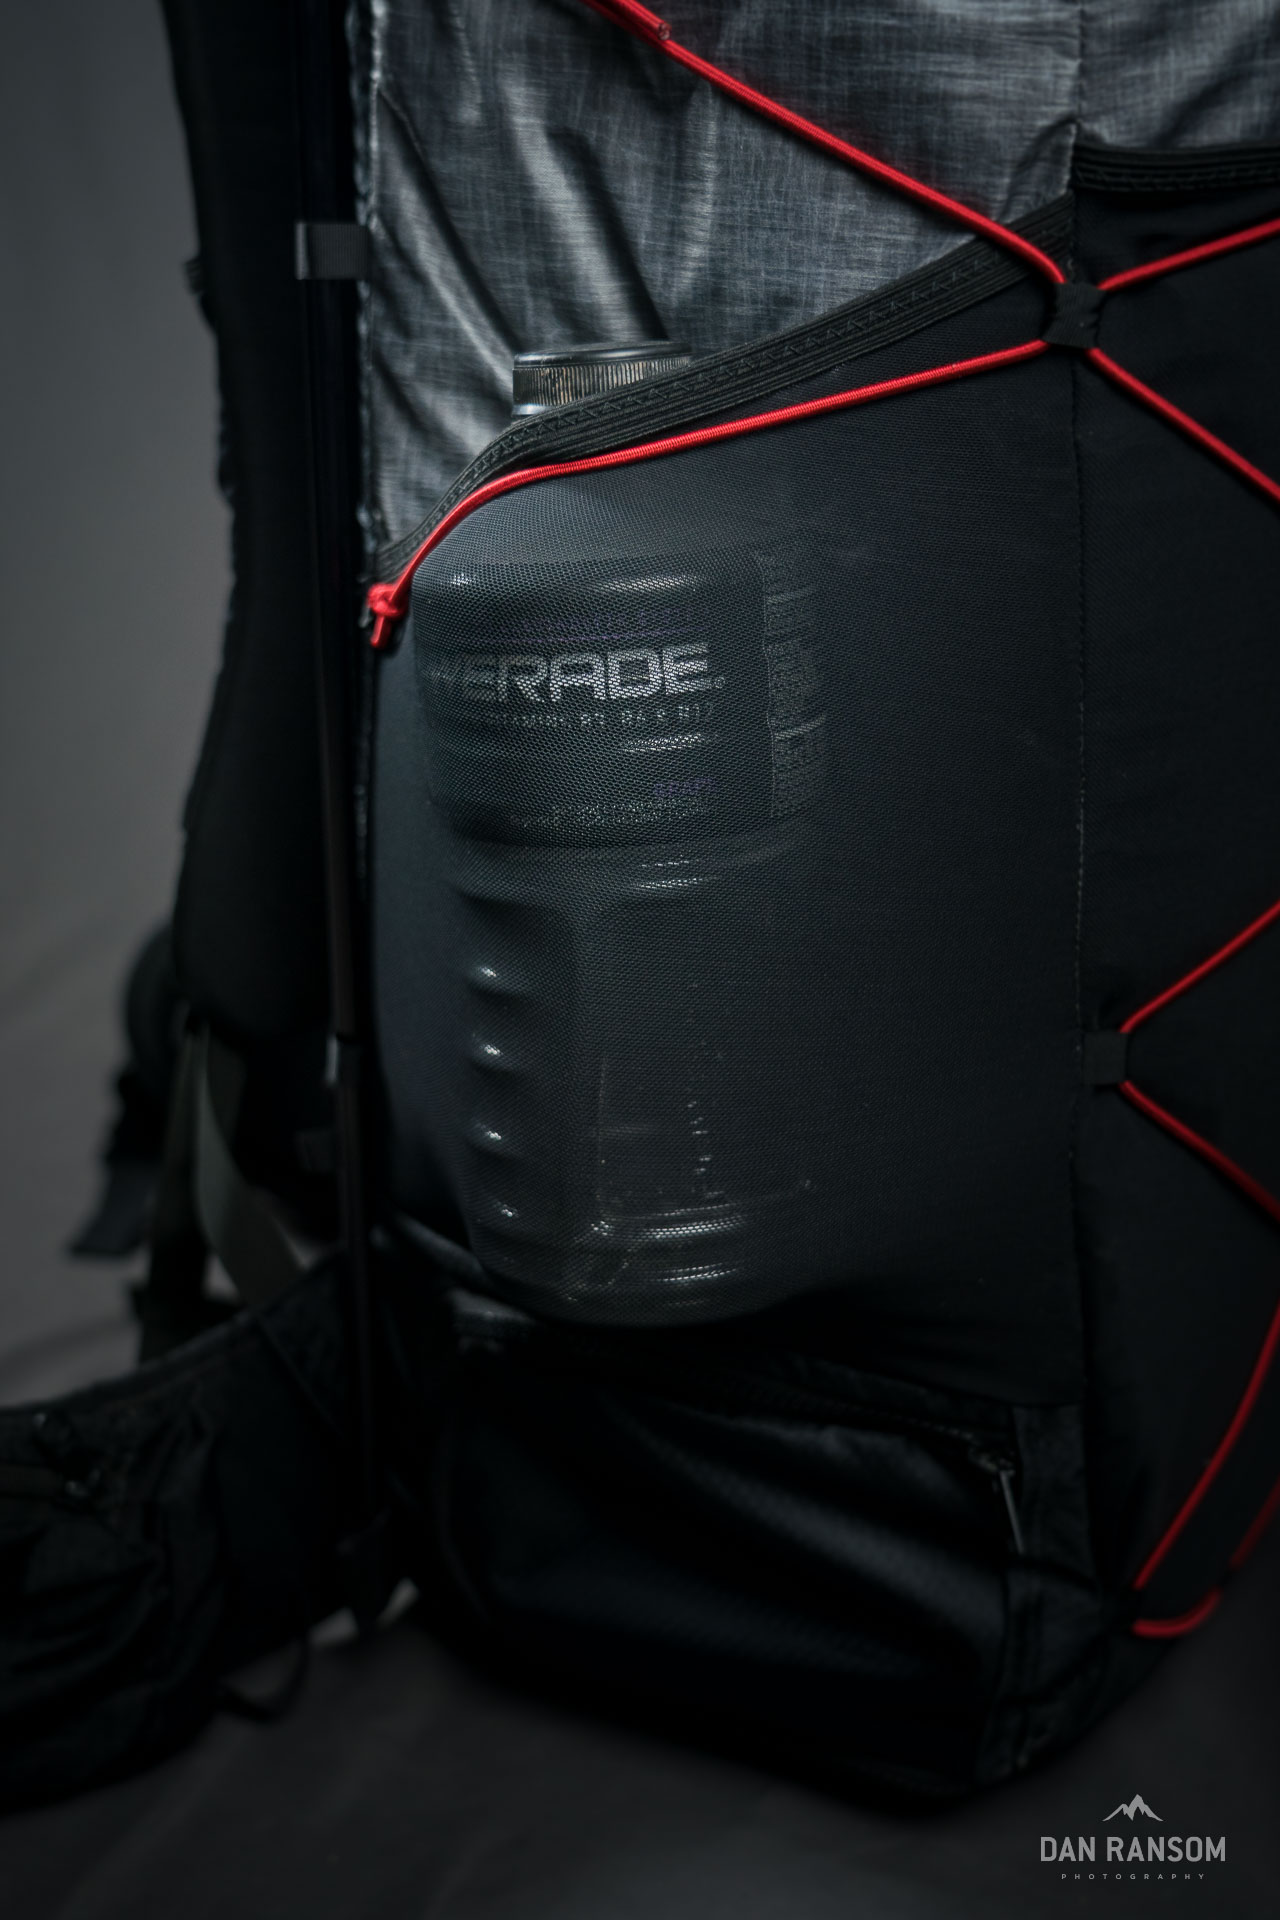
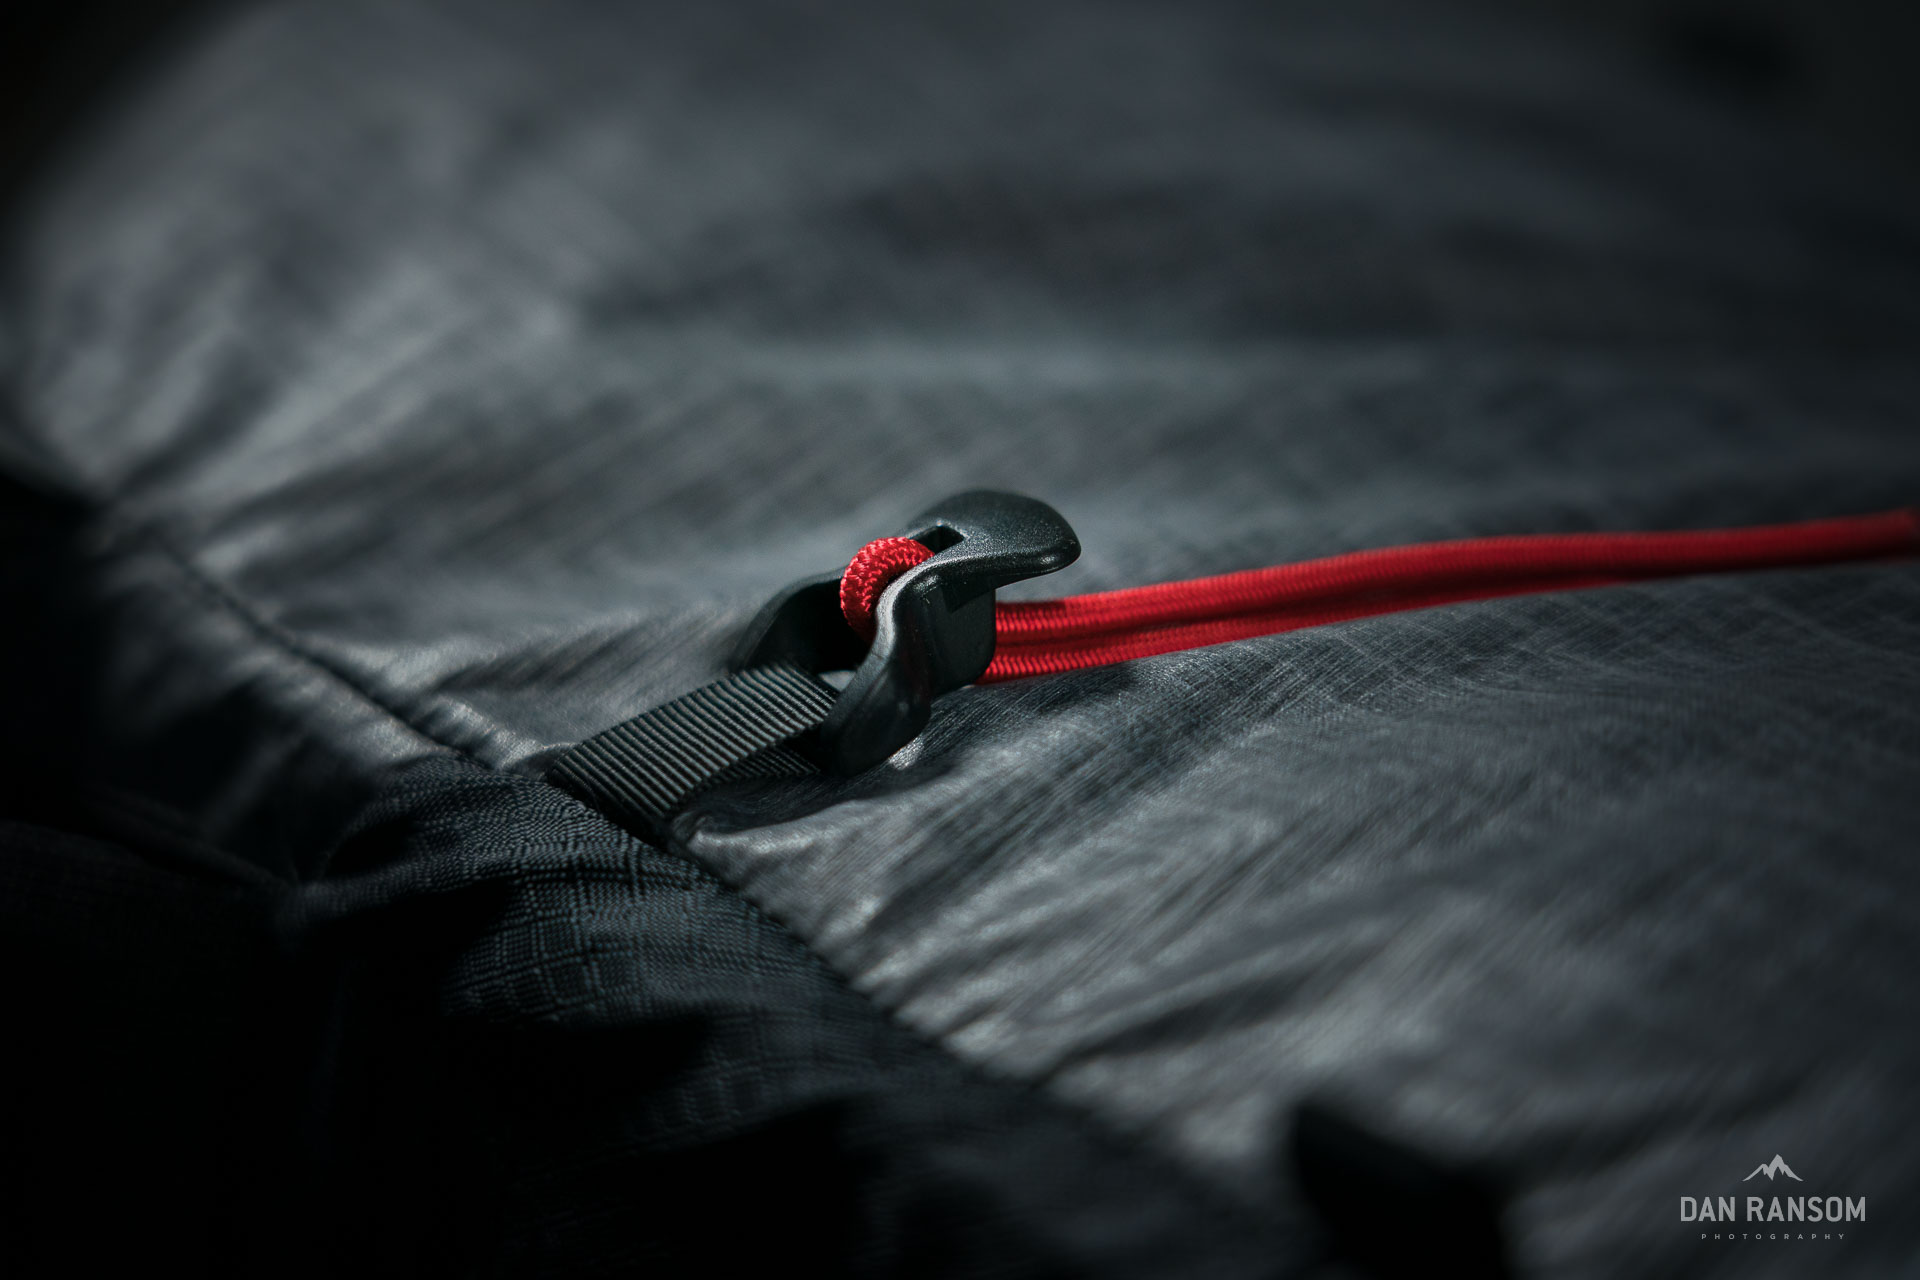
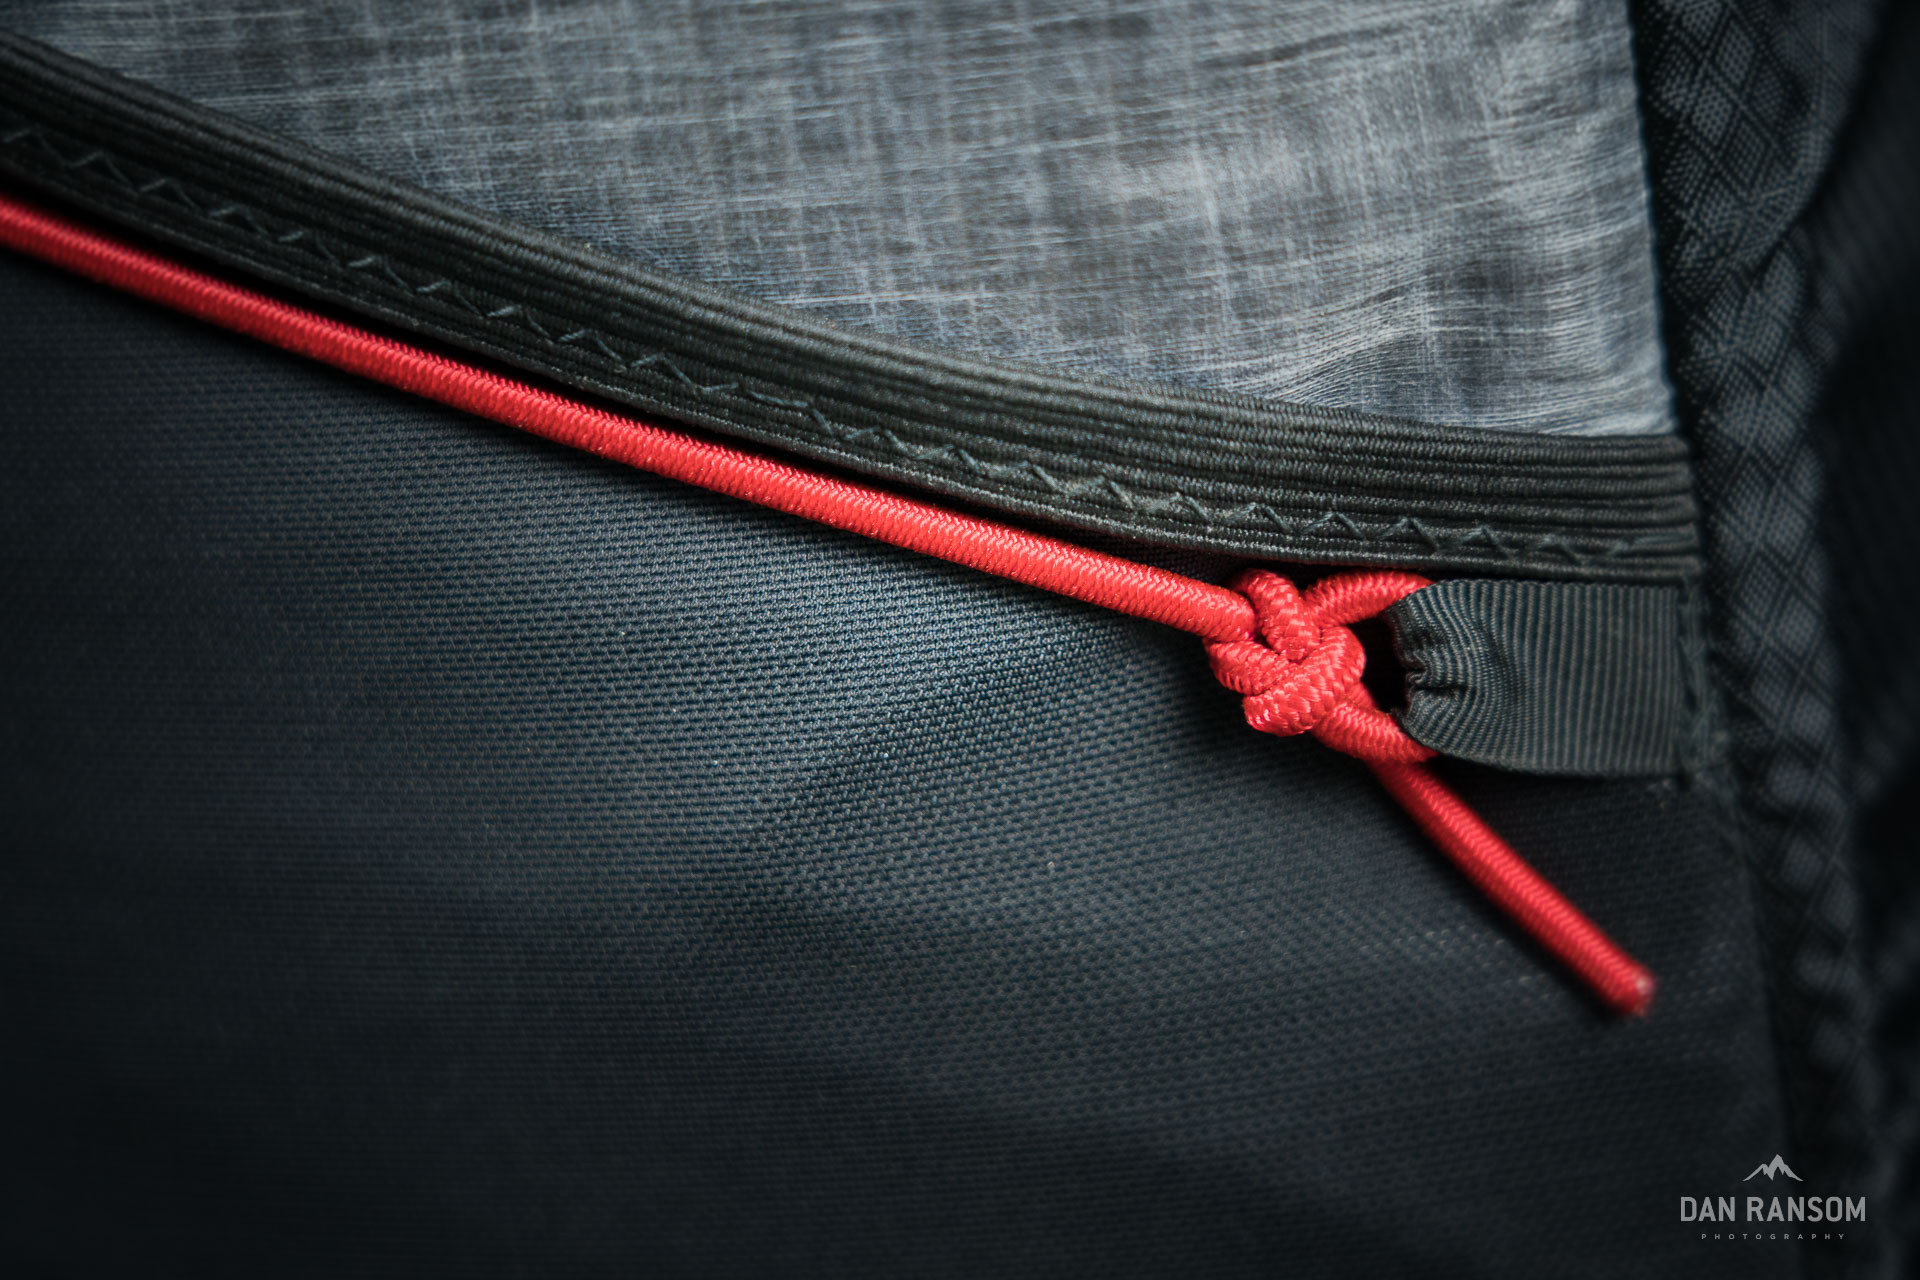
For the primary side pocket opposite the camera panel, I went with a Dyneema Hardline fabric. This is the same fabric used on Hyperlite Southwest packs, and those are the most durable packs I’ve used in terms of abrasion, so it was an easy choice. I used an elastic trim instead of a shock cord. I just think it looks cleaner and like that the pocket lays flat more or less when it isn’t stuffed.
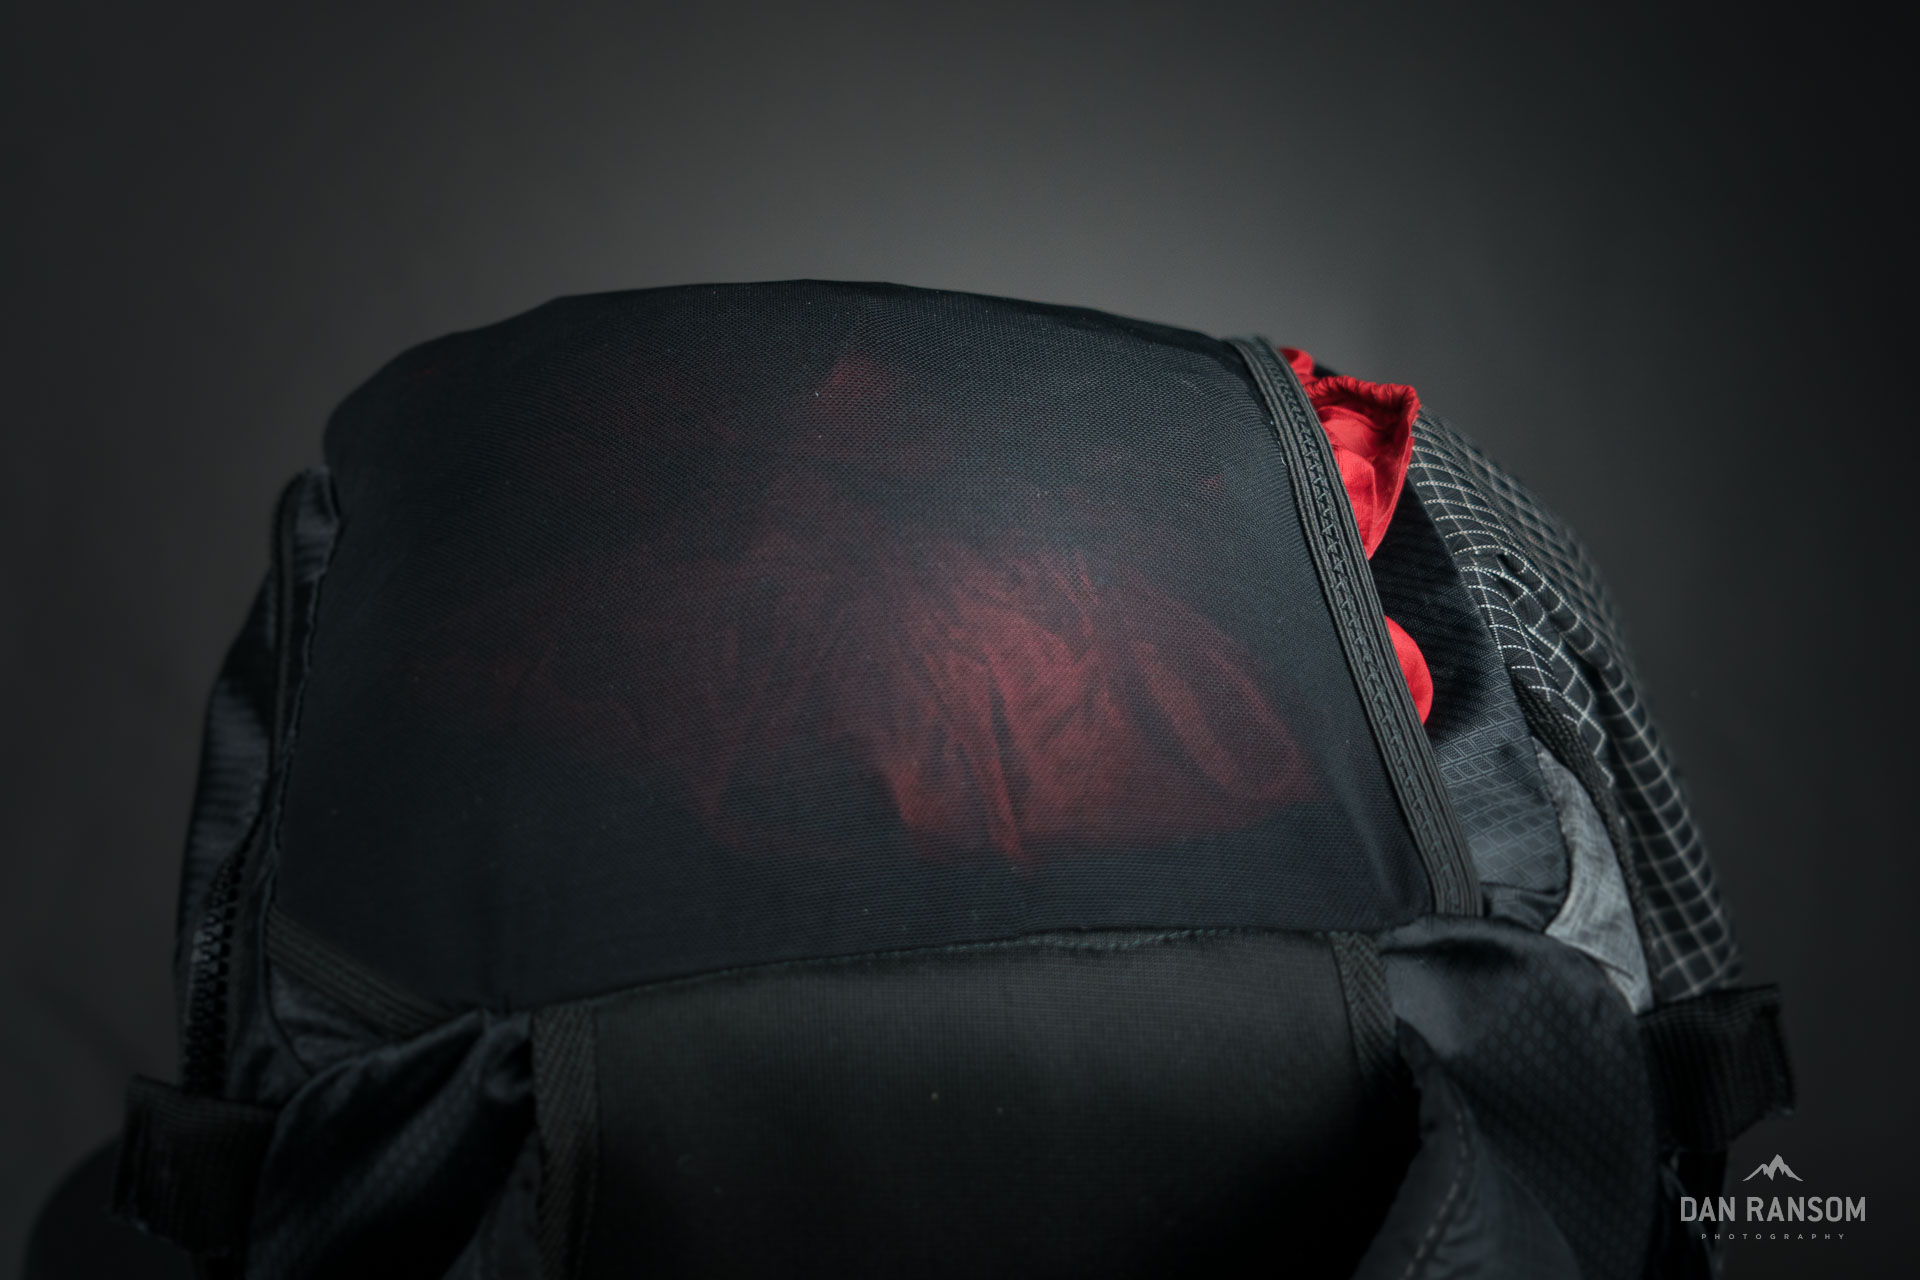
Final pocket is the bottom stretch pocket. I’ve never owned a pack with bottom pocket access, so the jury is out if it will actually be at all beneficial. Pretty psyched to give it a try though.
Fabric Choices
This could be debated ad nauseum, and if it wasn’t for a surprise order of Liteskin made by my wife, I might have gone a different direction. But so far, Liteskin has been a real pleasant surprise. It’s easy to pattern, easy to sew (minus the minor curling after cutting) and seems quite strong. Oh yeah and it looks rad too.
I worry about the abrasion over time, but with so much of the pack covered in Lycra Mesh, that’s gonna take a beating and fail long before the Liteskin fails.
The back and bottom panel are Hyper D 300. I landed on Hyper D thinking it would fare at least equally as well as Liteskin for abrasion with less chance of delaminating. And it was a whole lot cheaper. If I did a burlier version of this pack, I might consider making this out of 210 and 420 Robic. Shoulder straps are Hyper D on top, spacer mesh with smooth side out on the bottom, and ⅜ inch EVA foam inside. Lining for the backpanel insert is all 1.9oz ripstop, as well as the camera insert. This might be too fragile in the long run, especially the frame sheet pocket where it folds down and seals.
I’ve already realized I messed up a few dimensions, like moving the load lifters outward an inch or two, and possibly lengthening the top collar. But overall, I’m pretty psyched where this thing ended up, and itching to go destroy it once this little quarantine ends.

A few camera options for the backcountry I would consider “instant access.” Clockwise from top left: Mindshift Gear Panaramio 180, LowePro Sport, Ortlieb Aqua Zoom, Peak Designs Capture Clip, and LowePro chest pack.
Compared to Other Solutions
Whew. If you made it this far, I commend your perseverance. This last section is primarily about how this design compares to other solutions and a look at my current quiver of camera packs.
The top left is the Mind Shift Gear Rotation 180 – Panorama. It’s an absolutely brilliant design with a rotating hip belt and fanny pack camera insert that allows you to securely and easily get at your gear without worrying about dropping your camera or doing some contortionist moves to put it away. For good weather day trips, it’s probably my favorite pack. The downside is the camera insert is way too small for any body and lens combination larger than a Sony A7 series with 24-105 lens. The workhorse 70-200 doesn’t fit, which severely limits it’s usefulness. If this style of bag could be made with ultralight backpack design principles, and the size and bulk of the camera insert minimized, it would be absolutely killer. Unfortunately larger volume models are too heavy for what I’m looking for.
The top right pack is an older model LowePro Photo Sport with side access. It ticks a lot of the right boxes at first glance, but overall it is too small, and the camera insert takes up way too much of the volume of the pack to really make it worthwhile for anything more than a day hike. Also, significantly heavier than it needs to be, and a ton of features I will never use like a hydration sleeve and brain. I almost never use this pack anymore. It will probably become a donor pack for other MYOG projects.
Bottom right is the Ortlieb Aqua Zoom. Hands down my favorite chest pack system for technical terrain. It is 100 percent waterproof to the point it can take a complete swim and still keep your camera bone dry. It comes in at 7.1 ounces, which is insanely light for it’s feature set. I use this packrafting, canyoneering, and any time I expect water. (I still double bag it when I think I might be in suuuper gnarly conditions like class III whitewater where flipping my boat is very possible.) There’s only one problem – Ortlieb decided to discontinue this model, and I’ve not found any other products that even come close to how good this is. So, if you have a line on Ortlieb Aqua Zooms, hit me up. I’ll pay good money.
Bottom center is the famous Peak Designs Capture Clip. It is by far the most simple and compact solution. By clipping this onto a shoulder strap, you can mount your camera on your strap without the need for any other packs or hardware. Super clever. The only problem is, I hate wearing it. When it has a full frame camera with a 24-105 attached, I find it too cumbersome, too heavy, and annoyingly restricts my peripheral vision. It’s also not weatherproof, at all. It’s really not even bushwhack proof unless you want to lose a lens cap and scratch up your camera. When it starts to rain, you have to pack your camera away somewhere anyways, which means wrapping it up in clothes or other gear, or carrying a separate weatherproof insert. It also weighs 3.4oz for just the clip (not including the plate) which feels excessively heavy for a single use item that doesn’t do what I need it to do all that well.
And bottom left is a LowePro chest pack. I have a few of these in different shapes and sizes, and I use them regularly. They are usually between 6-8 ounces, provide full protection for you camera, can easily connect to shoulder straps or be stashed away in your pack during more technical sections, and are overall a simple way to keep your camera instantly accessible. However it restricts peripheral vision, makes your chest unbearably hot in some conditions, and isn’t weatherproof either. So for 6 or 8 ounces, it seems heavier than it should be. (For reference, the camera insert above is only 4.3 oz, is much larger, thicker foam, carries better, and is inside the pack. The extra weight is in the zippers, pockets, and heavy outer fabric.)
All of these solutions have their place. For a mountain bike or bikepacking trip, I’d probably take the Mind Shift, knowing it gives me the best user experience while riding, and I can put heavier gear in frame bags and rolls (Thanks to MikeSee at Lacemine29 for tipping me off on this pack). For canyoneering and packrafting, I’ll take the Ortlieb, and carry it on my chest while hiking, and in a bow bag while boating. For fair weather casual hiking, I might just take the Peak Designs, but if I’m worried I’m going to beat the camera up, I’d take a padded chest pack like the LowePro.
Even still, with all these options, I still did not have a pack that is the perfect marriage of ultralight backpacking design, and something that can carry a full frame camera with two lenses. And thus began my descent into perpetual frustration with MYOG, and the first version of what may an entirely worse product than all those I just listed…
The end.
Mine is nowhere near as pretty as yours but I too was trying to make a lite weight camera bag while stuck home! This was my first time sewing a pack so it didn’t come out to good but I am already working on version 2 as we speak. I was really impressed with your work!
My attempt is here: https://www.seekadventure.net/d/131-sewing-a-backpack-attempt-number-1
Hi Dan,
I just stumbled on this while doing some quarantine surfing about packraft trips. Looks like a great pack. And great website all around! I am curious what sort of photography system you have devised for packrafting? What type of camera are you using and how are you carrying it? For years I carried an SLR behind my seat in a hard shell kayak but it seems like there must be a better way in a packraft. I have been carrying one in a drybag between my legs but I’m finding that’s not ideal as it makes getting in and out a little tricky and packrafts don’t like to sit still in eddies, so pulling the skirt to access it is not always convenient. To top it off, I took a swim last summer on the Middle Fork Salmon and destroyed a D600. Any input you have would be much appreciated!
Benj
Yeah, those are all real good questions. The answer is… I haven’t found the perfect answer. The lightest solution has been an Ortlieb Aqua Zoom which is shown in the write up above. I usually place that in an Alpacka bow bag, so two layers of waterproof protection. That said, the ortlieb isn’t really burly enough for any kind of impacts or a significant swim. So, my best solution right now is there isn’t one. Sorry that’s not much help!
Got it. Let me know if you come up with anything! Are you shooting mostly Sony mirrorless? Is that what you use packrafting? I am wondering if a smaller mirrorless camera in a small Pelican case in an Alpaca bow bag might work well…at least on trips that don’t involve backpacking in very far?
Hi great pack, looks pro. I’m just trying to fix load lifters on my first myog mountain flyer pack, do you have any tips for locating them correctly? They’ll be fixed webbing (no ladderloc) so I’ll only have one chance to get it right, thanks 🙂